|
These delicious gluten free seared scallops are super quick to make for dinner! We love to eat them with this yummy arugula salad!
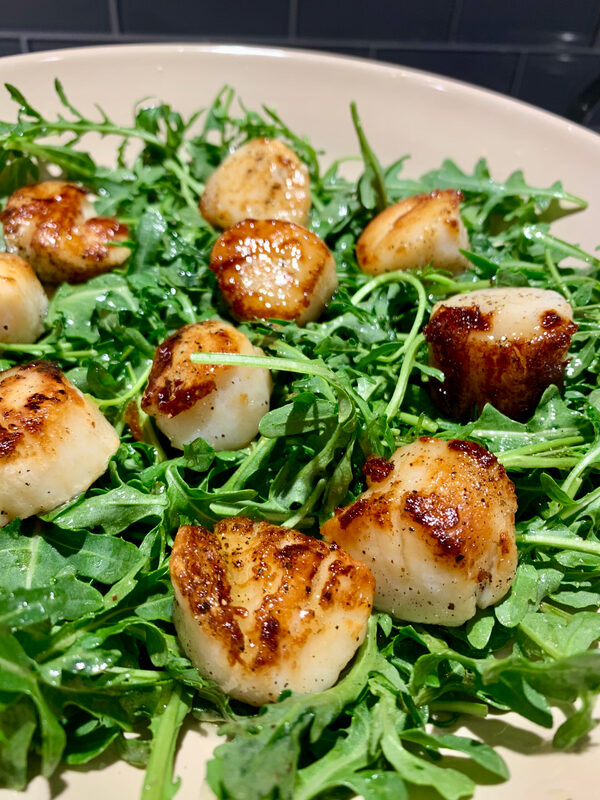
Seared Scallops are one of my favorite foods! I especially love this salad because it is ready in about 10 minutes! The Jalapeño Lime dressing is slightly spicy and a little sweet from the balsamic but overall finger licking good!
The secret to having perfectly seared scallops is making sure they are dry. I thaw them if they come frozen with paper towels in the bowl. Once the towel is wet, I replace it to ensure most of the moisture is removed from the scallop. If they are fresh, I still wrap them in paper towel to absorb the excess moisture. The second trick to perfectly seared scallops is having the pan smoking hot then adding oil and then adding the scallop. You will know when it is ready to flip to the other side when you see the brown creeping up the side of the scallop. It usually takes about 2 minutes on the first side then only about 2 minutes on the second side. Be sure not to overcook them or they turn rubbery. By now I am usually starting to drool…… Here Are Some Other Recipes You Might Like: Layered Summer Salad Pecan Crusted Tuna With Mango Salsa Caribbean Chicken Lettuce Wraps What Are Scallops Anyway? Scallops are bivalve mollusks and part of the Pectinidae family. They are related to oysters, clams and muscles. I think they have a slightly sweet flavor and pair well with lots of different herbs, spices and flavors. I buy the wild caught dry scallops. “Dry” is an industry term that indicates the scallop is natural and has not been altered or treated in any sodium solutions or added moisture. The healthiest and best tasting scallop is a dry scallop in my opinion. Here is the Wikipedia definition of scallops in case you want to read about them more in depth. What Do I Need To Make This Recipe? To make these delicious seared scallops, You will only need a few ingredients. Which is one of the reasons that I love this recipe! You will need enough scallops to feed the people you are wanting to feed. I use 10 medium size scallops for 2 people. If you are making this as an appetizer, which is also a fantastic idea, you can estimate 2-3 per person depending on what other items you are serving. You will need some Jalapeño Olive Oil. I purchased mine from the Gilbert Olive Oil Company. I have also purchased it from the Queen Creek Olive Mill. Both are local companies in Arizona. If you live outside of AZ and don’t want to order I highly recommend looking at a local olive oil manufacturer or the farmer’s market. BTW…this is not a sponsored post, I just like their stuff. Also some Jalapeño Balsamic Vinegar. I purchased it at the Gilbert Olive Oil Company. See the link above. I think white balsamic vinegar would be an ok substitution as well just less jalapeño-y! 3 Limes, or some Lime Olive Oil if you don’t have limes on hand. I purchased the Lime Olive Oil from the Queen Creek Olive Mill. See the link above. Salt and Pepper One bag of Organic Pre-washed Arugula. If you are making these seared scallops for more than 2 people, you will need more scallops, arugula and limes… Pin Me So You Can Save The Recipe: 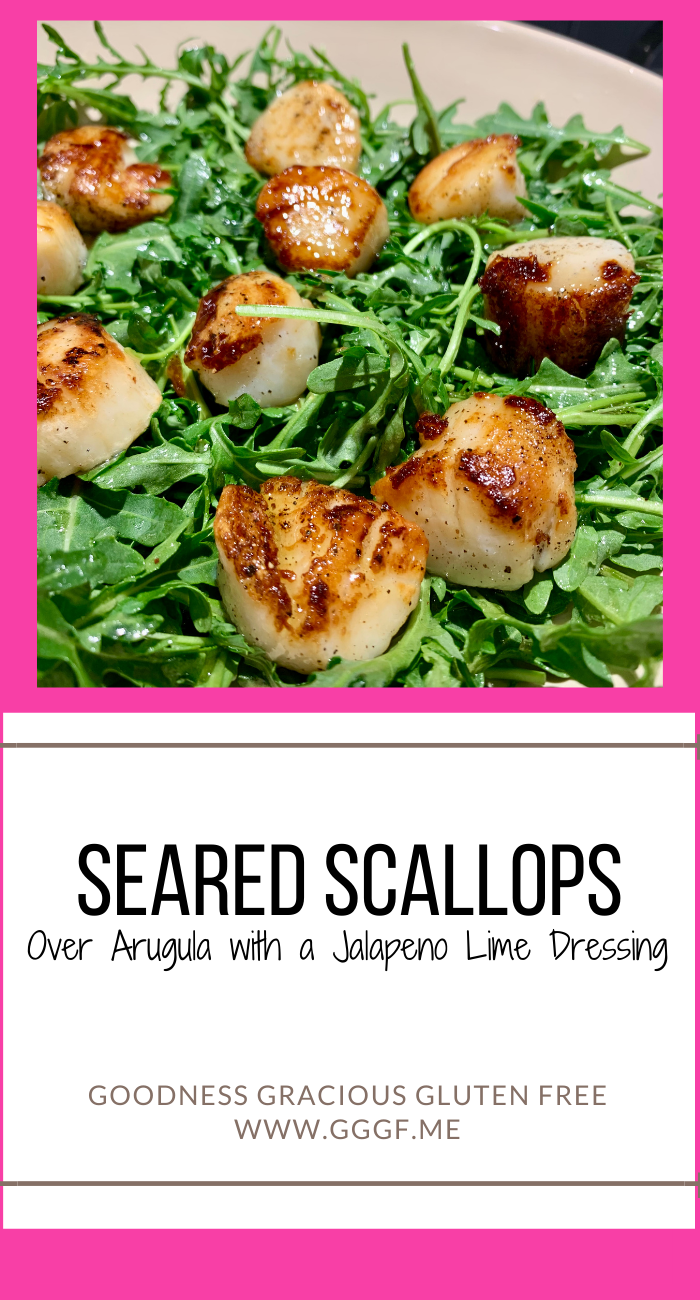
Here’s The Video Of How To Make It:Watch along and see how I make these delicious Seared Scallops. I didn’t include any footage of us eating them…you are safe. LOL
And Finally.. Here’s The RECIPE:
Seared Scallops over Arugula with Jalapeño Lime DressingPacked with flavor! Easy to make! 10 minutes to a fantastic appetizer, lunch, or dinner! SERVINGS 2 INGREDIENTS
As Always, Best Wishes for Gluten Free Dishes! XO, Michelle
0 Comments
This gluten free avgolemono soup is creamy and delicious and a perfect comfort food!
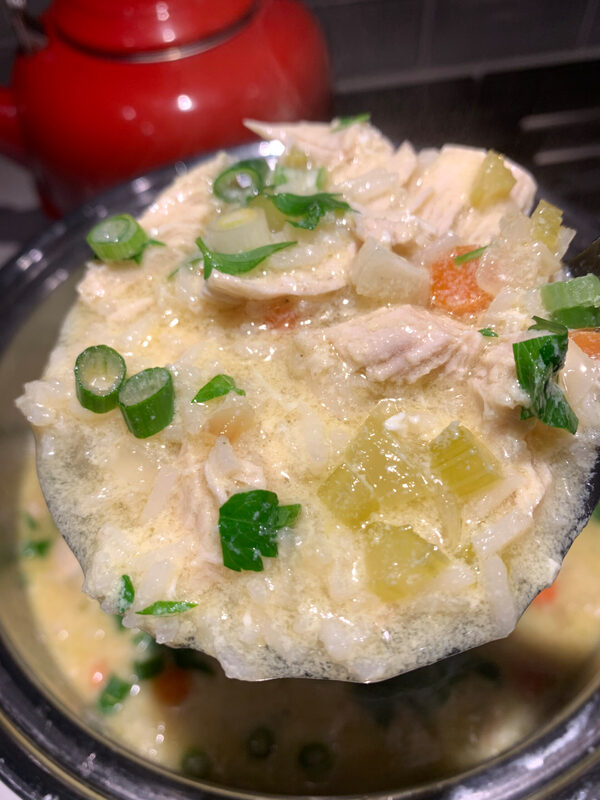
Do you crave soup when it’s cool and rainy? I do! This Avgolemono soup was perfect for the cool and wet weather we have been having in Phoenix lately!
I love almost anything with lemon in it and my friend gave me some lemons from her tree. I was debating making lemon bars or this avgolemono soup and with the weather the soup won! According to Wikipedia: Avgolemono (Greek: αυγολέμονο or αβγολέμονο)[1] or egg–lemon is a family of sauces and soups made with eggyolk and lemon juice mixed with broth, heated until they thicken. They are found in Greek, Arab, Sephardic Jewish, Turkish, Balkan and Italian cuisine. I can’t actually remember when I had this soup for the first time, but I find it so comforting. What Do I Need to Make This Soup? I used homemade chicken bone broth that I had frozen, if you do not have that on hand, chicken broth is just as yummy. Jasmine Rice or cauliflower rice Carrots Onion Celery Chicken breasts or rotisserie chicken Green onion Parsley as a garnish Lemons Eggs Olive Oil Salt and Pepper Directions: I am going to give you two options to make this soup. I have done it both ways. They are equally delicious. Use a medium-sized pot and turn the stove on to medium heat. Add a drizzle of olive oil. Saute your chopped onion, celery, and carrots until tender. Add the broth to the pot. Stir. Juice 1 lemon into the broth. Add the chicken breasts to the liquid. Simmer until they reach an internal temperature of 165 degrees. Remove them from the pot and shred the meat with a fork. Add it back into the pot. OR This is where you get to choose a different option if you would like! You can add in shredded rotisserie chicken meat if you would like to save time! Stir in the rice. Let it simmer for about 15-20 minutes until the rice is tender. OR You can keep it low carb and use cauliflower rice. If you use cauliflower rice you only need to simmer for a few minutes until the cauliflower is soft. In a separate bowl, scramble the eggs. Add the lemon juice to them and whisk to combine. Temper the eggs by adding a ladle full of broth to the eggs while whisking. Pour the eggs into the soup while whisking. Remove from heat. You are ready to garnish with chopped green onions and parsley. The eggs will make it thick and creamy. So yummy! ENJOY! Pin THIS now Make it Later! 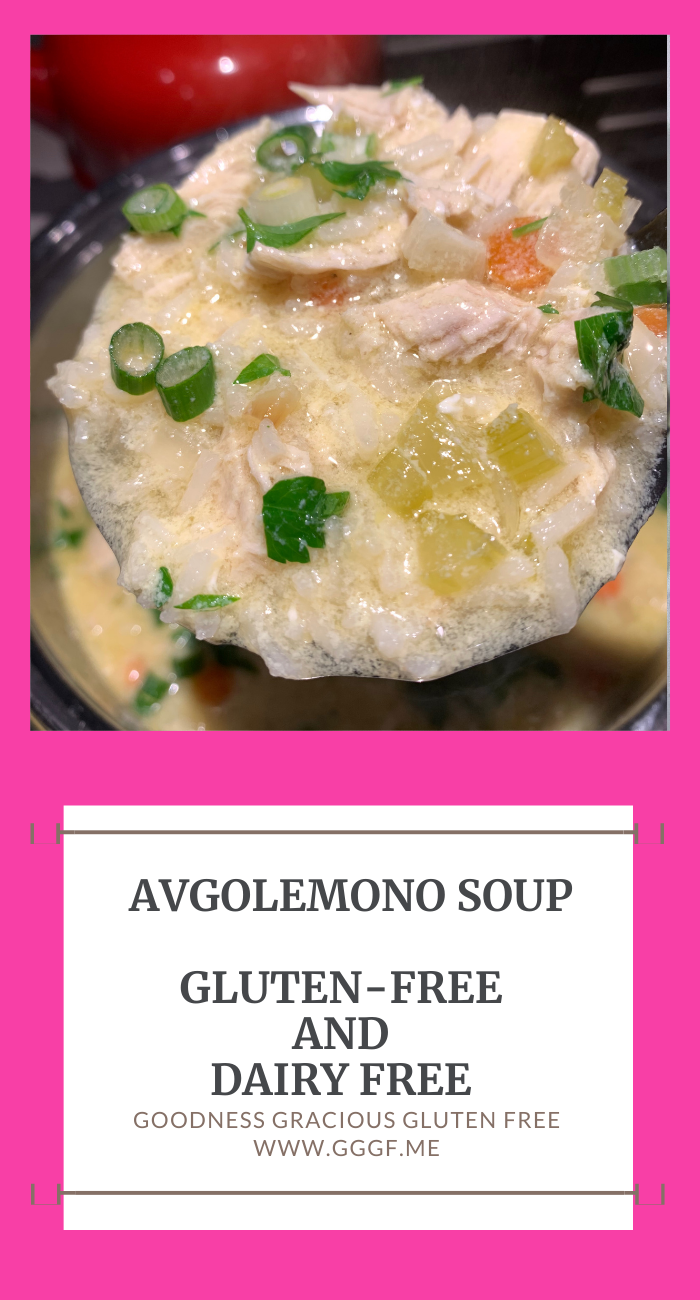
If you are looking for soup recipes, you might also like these recipes:
Pressure Cooker Broccoli Cheddar Soup Instant Pot Creamy Spicy Soup I hope you love this Avgolemono soup. My favorite part is the options based on how much time I have to make it! If it’s a quick weeknight meal, I will use rotisserie chicken. If I have time I will cook the chicken breast in the broth. I guess I just love options! Avgolemono SoupDelicious comforting lemony chicken and rice soup. Perfect for cool weather days! INGREDIENTS
INSTRUCTIONS
I hope you love this soup as much as we do! As Always, Best Wishes for Gluten Free Dishes! XO, Michelle
We love bacon brussel sprouts but these are perfect for a quick dinner because they are made in the air fryer! As always, they are gluten free too!
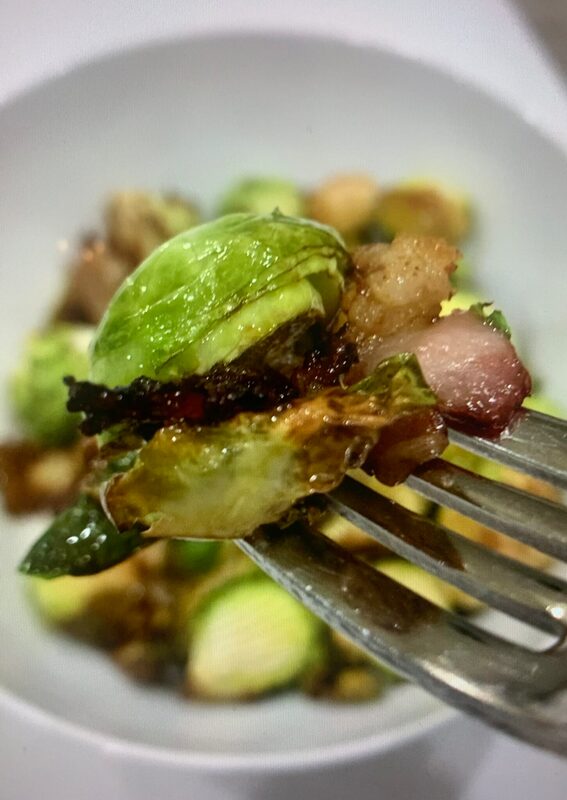
The holidays are quickly approaching! If you are looking for holiday side dishes try my air fryer bacon Brussel sprouts! They are crispy and delicious. Not to mention easy to make.
If you are cooking for a large crowd, try my oven-baked Brussel sprouts that are equally delicious and you can make a larger amount at once. You can add the mushrooms to this recipe or leave them out… it’s up to you! What You Need to Make These Air Fryer Bacon Brussel Sprouts: Brussel sprouts Thin cut bacon Balsamic Vinegar or reduction An Air Fryer. I have the air fryer lid that goes on top of my Instant Pot! I love it especially for just 2 people! Air fryer bacon Brussel sprouts, I refilled the air fryer basket twice to make sure they all got crispy! How Do I Make These? Start by washing and drying your Brussel sprouts. Cut them in half. Chop up the package of thin cut bacon. I like medium sized pieces because the bacon gets crispier in the air fryer. Put the Brussel sprouts in the air fryer basket. Put the bacon in the air fryer basket. Drizzle a little balsamic vinegar over the top. Sprinkle with Salt and Pepper. Turn the air fryer on for 4 minutes at 400 degrees. After it is done, use tongs to flip the food around. Turn the air fryer on for 4 more minutes at 400 degrees. After it is done, they should be crispy and delicious! Serve with your favorite protein. Here’s The Easiest Way To Clean Your Instant Pot Air Fryer: I love my instant pot and the air fryer lid that goes with it. The best part is it cleans up really easily! You can soak the basket with a little soap inside the instant pot bowl. Or you can put them all in the dishwasher! The air fryer lid cannot get submerged in water because of the electronic compartments. Pin THIS Make It LATER! 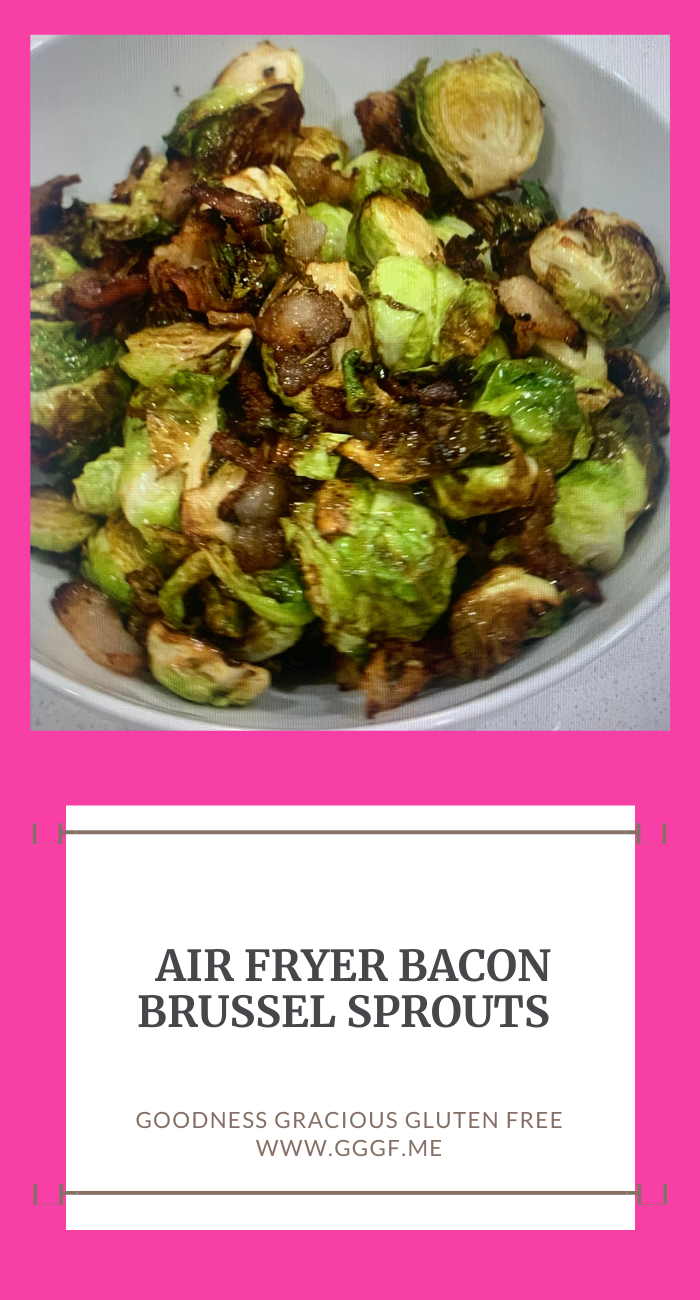
Here Are Some Other Side Dishes You Might Like For The Holidays:
Shaved Brussels Sprout Salad Healthy Harvest Salad Here’s The Video On How To Make These Air Fryer Bacon Brussel Sprouts:
I personally love all the side dishes during the holidays! I am not a huge turkey fan, and currently cannot eat it due to food sensitivities, but I love the sides!
What are your favorite side dishes? Here’s The RECIPE: Air Fryer Bacon Brussel SproutsThis is a fast and delicious side dish that is perfect for the holidays or really any day paired with your favorite protein! EQUIPMENT
I hope you like this version of my bacon Brussel sprouts! As Always, Best Wishes for Gluten Free Dishes! XO, Michelle
This gluten free chili is cooked in your Instant Pot and is a quick and easy dinner!
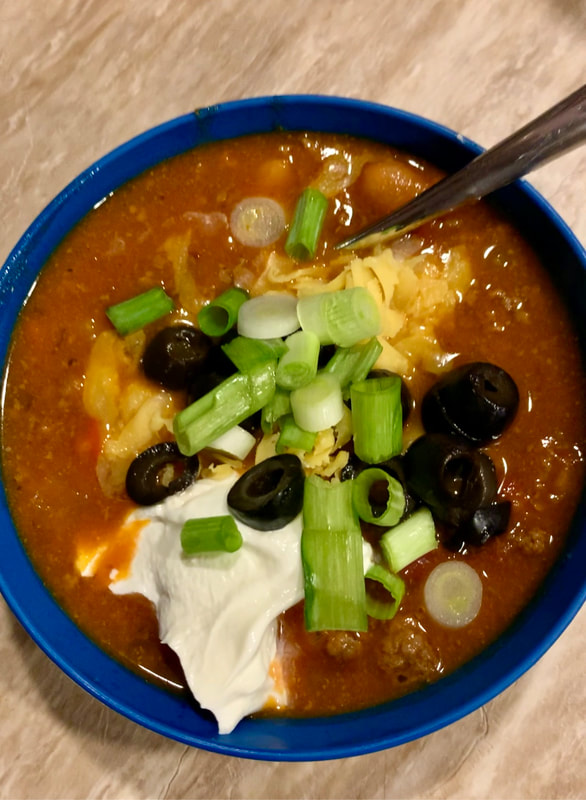
Chili in my instant pot is a quick and easy dinner! We recently went to Flagstaff to visit our daughter who lives there. The evenings were cool and it got down to 30 degrees at night! Burr… So I decided to make my Instant pot chili.
My daughter who lives in Flagstaff, has a goofy sense of humor. She was totally on board to help me shoot the video to go with the chili. I hope you watch it to get a little giggle! This chili is perfect for year-round but I especially love it in the fall and winter. It is comfort food and it is delicious! You can add whatever toppings you like to it to make it your own. What Do I Need To Make This Chili? This chili is super easy and it all is made in the Instant Pot! I use the sauté button to cook the hamburger. Dump all the ingredients in, give it a good stir, then I switch the mode to chili and seal the lid. Once it beeps, dinner is ready! You will need the following ingredients: 1 Red, Yellow and Green Pepper chopped. A Yellow Onion, chopped. 2 Stalks of Celery, chopped. S & P 2 Cans of Chili Beans. 1 small Can of Tomato Sauce. 1 large Can of Roasted Chopped Tomatoes. 1/2 Can of Tomato Paste. 1 Box of Beef Broth. 2 LBS of Ground Beef. Chili Powder. Cumin. Sweet Paprika. Smoked Paprika. Garlic. Chipotle Pepper if you want it a little spicy or you can also add Cayenne. Any toppings you would like. I like: sour cream, shredded cheese, green onions, black olives and sometimes serve it over rice or cauliflower rice. And a finger…. if you aren’t careful when cutting up your veggies… Here’s The Video on How To Make Chili in my Instant Pot:
I hope this video gave you a giggle or at least a smile. We had fun making it. HEHE!
If you purchase something from my Amazon store, I receive a small commission. It is not an additional cost to you. Here is my disclosures and policies. Pin THIS Now Make It Later: 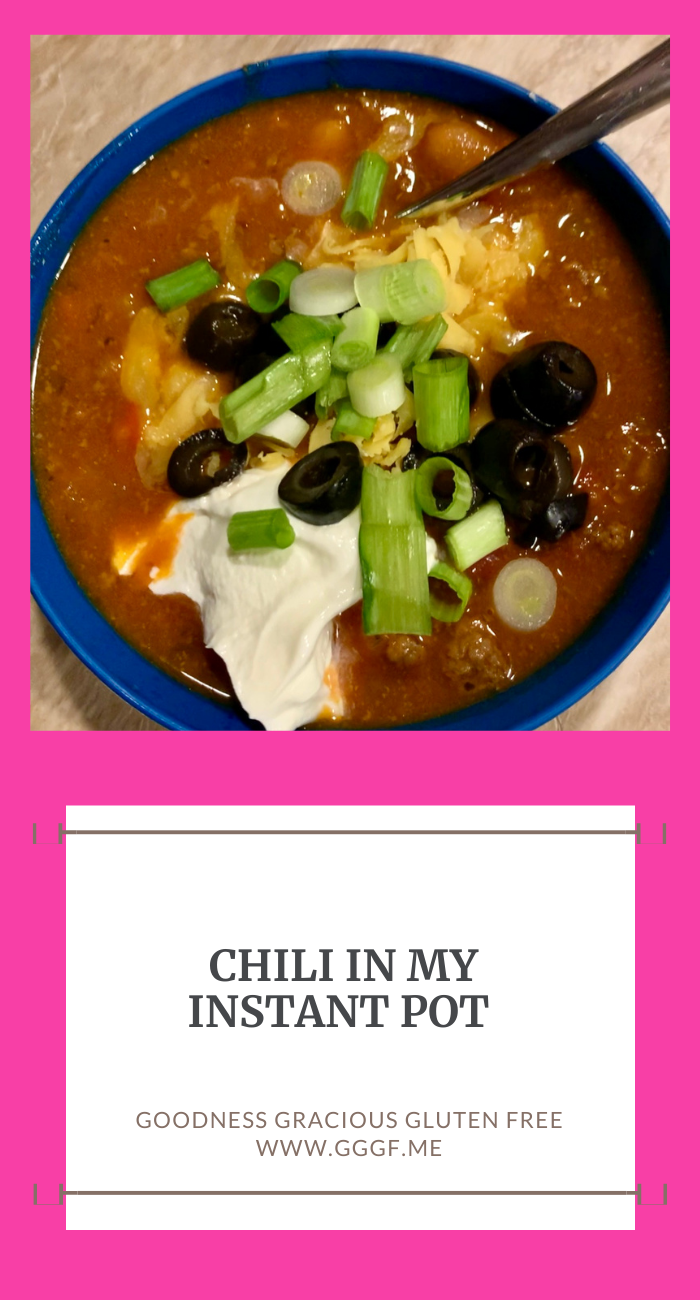
If you don’t have an Instant Pot you can also make this in your slow cooker. However, Christmas is coming and I would highly recommend that you put it on your Christmas wish list if you don’t have one.
Here’s The Recipe: Chili in My Instant PotThis is a delicious recipe for Chili! Plus it's made in the Instant Pot so it's super fast and easy to make! EQUIPMENT
INGREDIENTS
INSTRUCTIONS
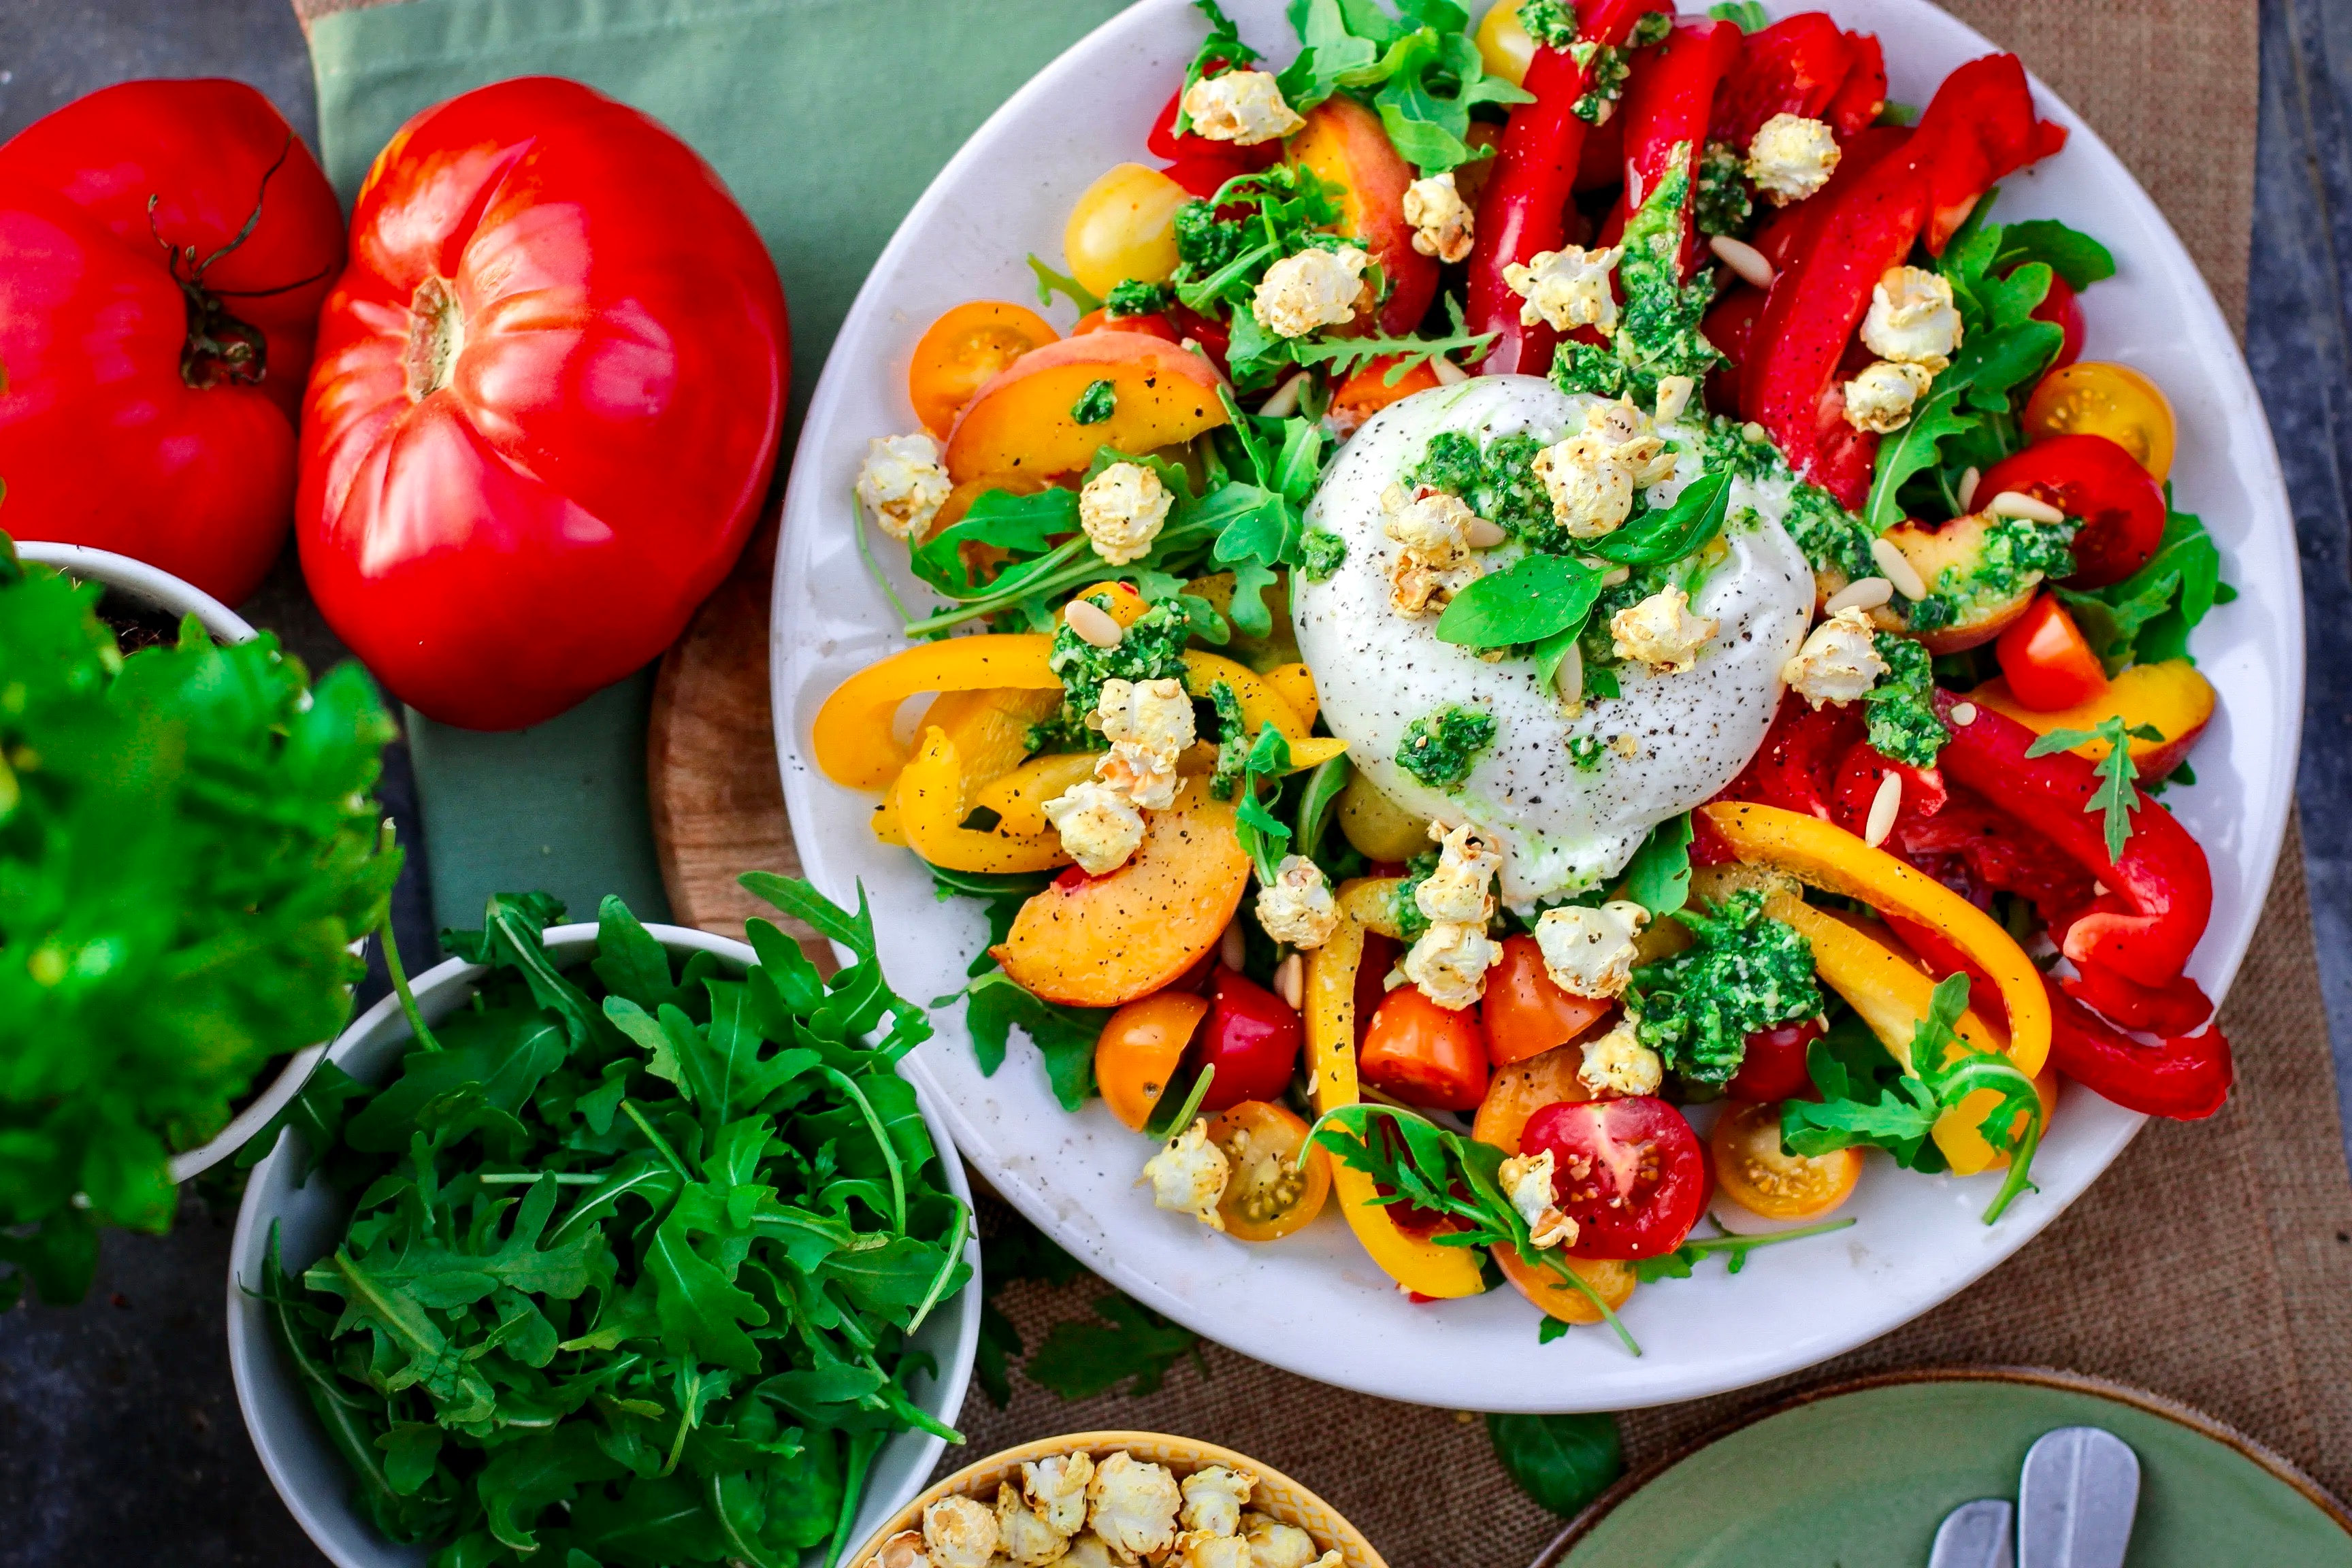
I hope you enjoy this recipe! As Always, Best Wishes for Gluten Free Dishes! XO, Michelle Do you dream of far away places based on the food you are eating? This Gluten Free Mediterranean Chicken Salad makes me dream of eating it overlooking the Mediterranean Sea!  My daughter requested a recipe for my mediterranean chicken salad so this is for her. As a foodie Mom it makes my heart happy that both of my girls like to cook and are pretty darn good at it! It’s super fun to watch what they make and honestly we send each other food pictures… totally nerdy I know! But I love it. I know most of the world is eating everything pumpkin but it’s still almost 100 degrees in Arizona and it doesn’t feel like fall yet… unless you are up at the crack of dawn and then it’s beautiful outside. Just ask my hubby! lol I love this Mediterranean chicken salad because it is a fast lunch or dinner and most of the ingredients are staples in my kitchen so that makes it easy. What Ingredients Do I Need To Make This Mediterranean Chicken Salad? This is what I love to put in my salad, however if you don’t like anything you can leave it out or substitute it for your favs! Chicken breasts Greek Seasoning S & P EVOO Balsamic Vinegar Garlic Cucumber Tomato Red Onion Roasted Red Peppers Feta Arugula Kalamata Olives Artichoke Hearts To start off this recipe, you will need to cook the chicken. Put the chicken breasts in a baking dish that you have drizzled with olive oil. Lay the breasts in the pan. Drizzle with a little balsamic vinegar. Sprinkle with greek seasoning and S & P. Bake in a 350-degree oven for about 30 minutes or until they reach an internal temp of 165 degrees F. While the chicken is cooking, I like to start on the chopping of my salad. I start with kitchen shears and the arugula, so the pieces aren’t so big. Lay the arugula in the bottom of a bowl. Use kitchen shears to chop it up a little. Arrange the rest of your chopped ingredients into sections on top of the arugula. Make a simple dressing in a bowl of EVOO, red wine vinegar, greek seasoning, garlic powder and S & P. Whisk it all together. Once the chicken is cooked, slice it into pieces and arrange it on your plate. Serve with the salad. You can toss the salad so you get a little bit if each topping…. unless you are like me and just want to eat feta lol. PIN THIS NOW MAKE IT LATER: 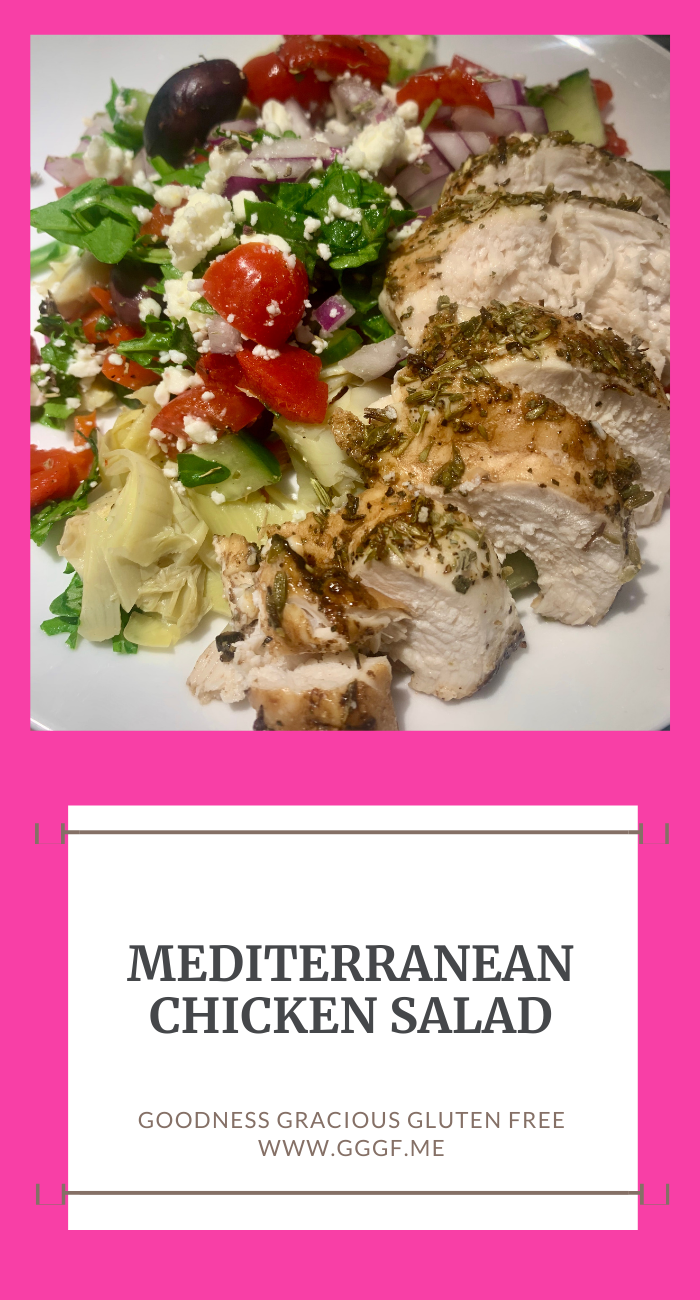 What are some of your favorite summer foods that you carry over into fall and winter? I have a few favorite summery foods that we eat all year. Here are a few you might like too: Pecan Crusted Ahi Tuna with Mango Salsa Shredded Brussels Sprout Salad Thai Cabbage Salad Here’s The Printable Recipe: Mediterranean Chicken SaladThis recipe will make you dream of eating on a patio overlooking the Med. INGREDIENTS
After typing this up I am wishing for this for lunch! But, my chicken is frozen so that won’t be happening! LOL! Here’s A Video For You To Watch Me Make This Mediterranean Chicken Salad: Hope you all have a great day!
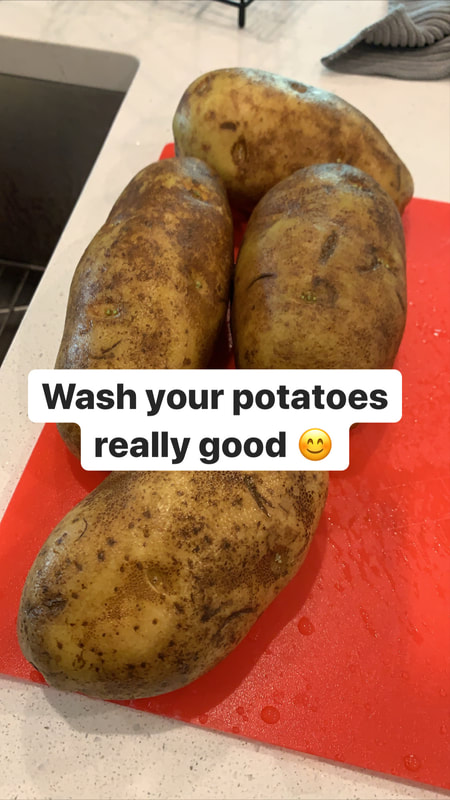
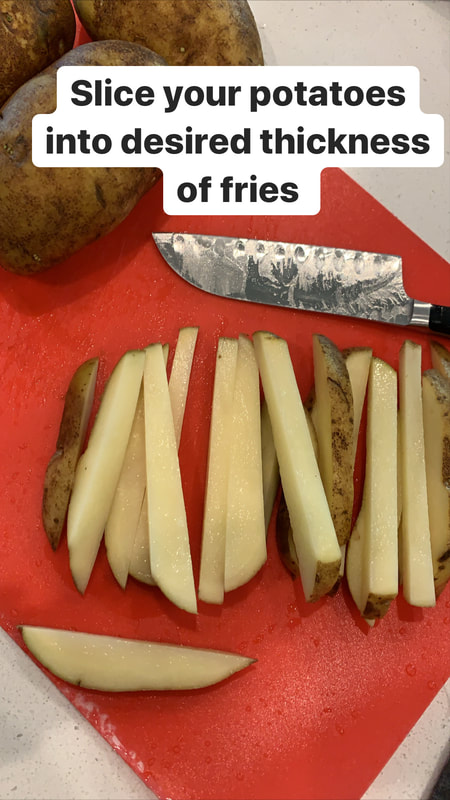
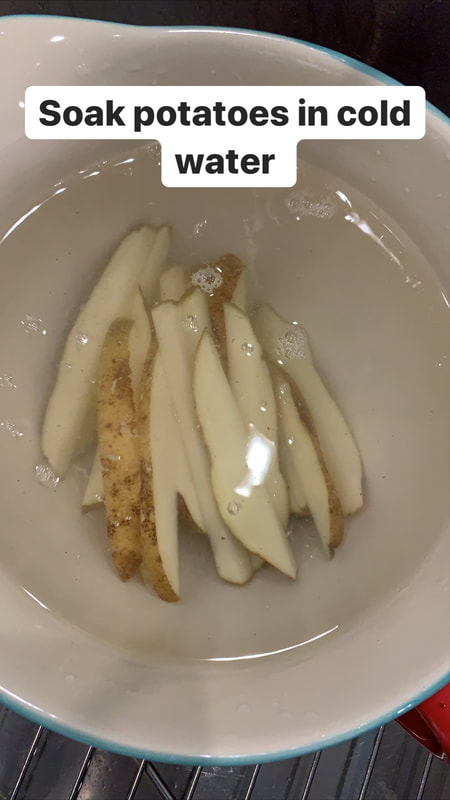
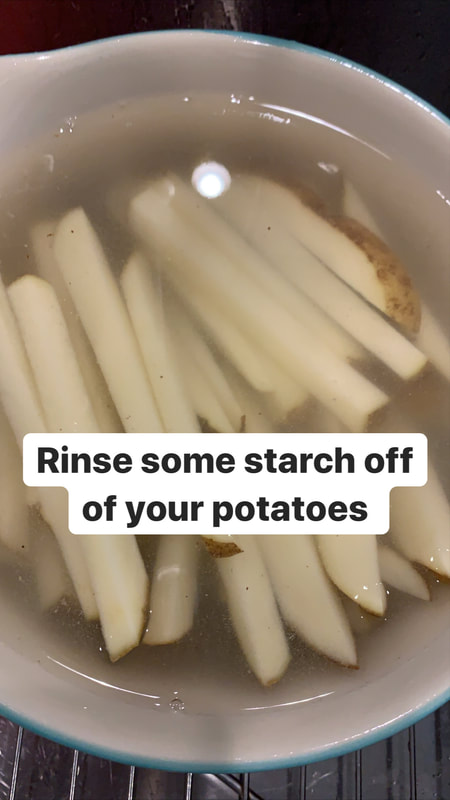
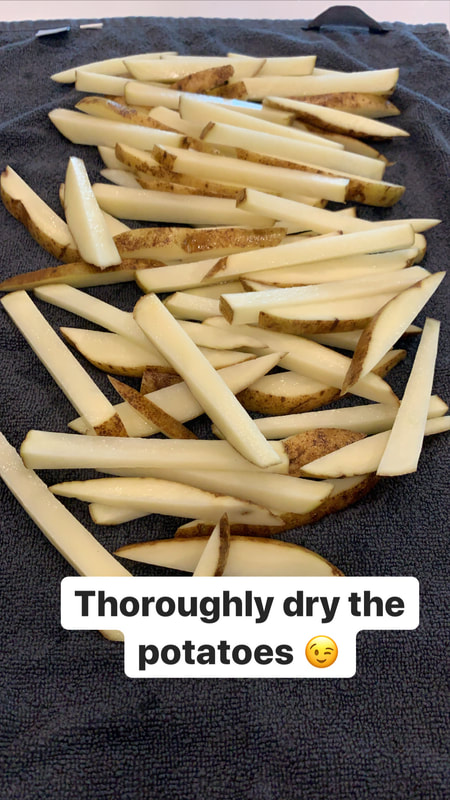
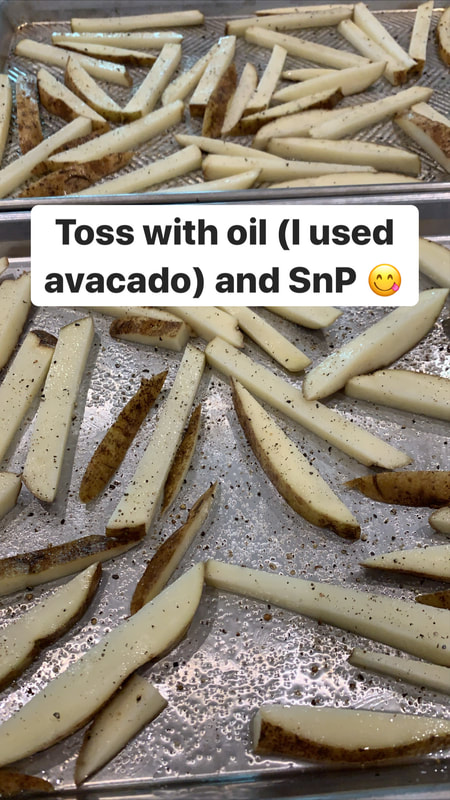
As Always, Best Wishes for Gluten Free Dishes! XO, Michelle Get your ketchup or ranch ready to try the best gluten free oven french fries! 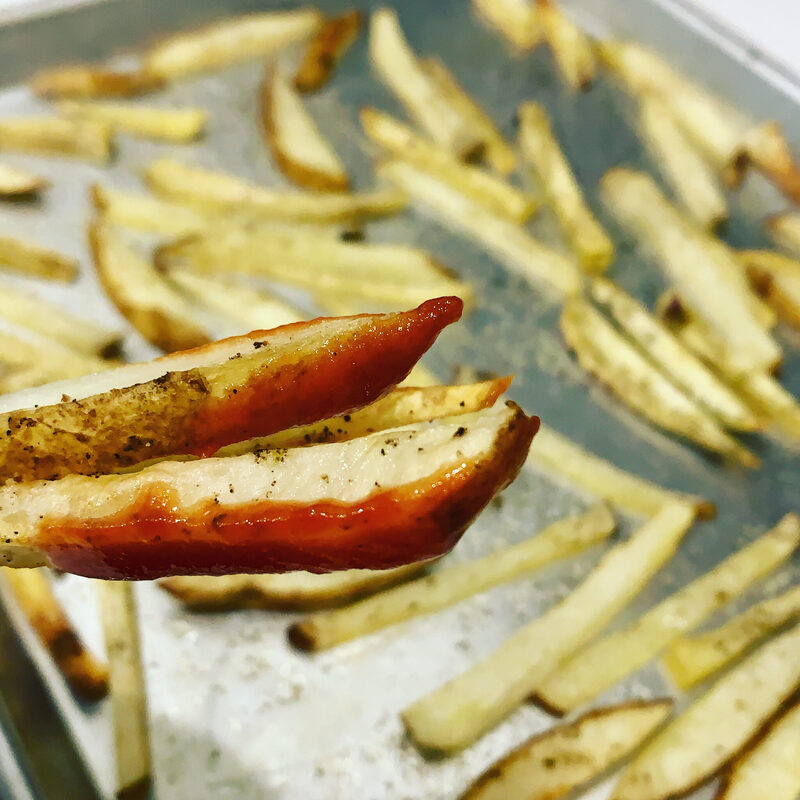 I love french fries that are crispy on the outside and fluffy on the inside! They are my favorite! I don’t really have a thickness preference, I like them thin or THICCCK (my daughters would say thick with two c’s if they are really thick.. lol)! How do you like your fries? Sweet Potato or Regular Potato?I usually go back and forth with our potato choices when it comes to french fries. We like them both! Sometimes, I even do a combo of potato types. Sweet potatoes come in a few different colors, however, it doesn’t affect the taste of the potato. Sometimes I like to mix up the colors just for the aesthetic. If you are like me and love potato products, just make sure to season them well to bring out their delicious flavor. What do you need to make these awesome french fries? You will need some potatoes or sweet potatoes or a combo of both. 1-2 baking sheets, depending on how many french fries you want to make. Olive or Avocado oil to drizzle them in. Salt and Pepper as well as your favorite dipping sauces. A bowl to wash them off in. An oven to cook them in. A clean kitchen towel to dry them with. A knife to chop them up with. (The link is my favorite knife) And last but not least a cutting board to chop them on. Here’s My Method to make them fluffy in the middle and crisp on the outside:
When I make pretty standard-sized french fries, I bake them at 375-400 degrees. It usually takes about 20 minutes or so. Honestly, I usually forget to set a timer because I start on other parts of dinner and they are done! lol. If you are going to reheat your fries the next day you might not want to put them in the microwave. If you do they will be soggy. I like to throw them in a pan on the stovetop for a few minutes to warm them up. If you purchase an item from my links I may get paid a small commission for it. Here are my disclosures and policies.
What are your favorite toppings? It was #nationalfrenchfry day earlier this week and I asked people on Instagram what their favorite toppings are. First off, their responses made me hungry! Secondly, I now need to make french fries and try them with their suggested toppings. Here are few suggestions: Siracha, Mayo and ketchup Siracha, pork and cheese sauce Vinegar (not malt because it’s not gf) ketchup Mayo Loaded like nachos Carnitas topped with taco toppings Fried eggs and bacon Herbs and garlic butter Lemon and herbs Sea salt and pepper No matter how you top your french fries, I hope you love this recipe! Don’t forget to join the mailing list so you never miss a new post! As Always, Best Wishes for Gluten Free Dishes! XO, Michelle These delicious honey chipotle lime shrimp are so yummy you will want to put them on repeat! 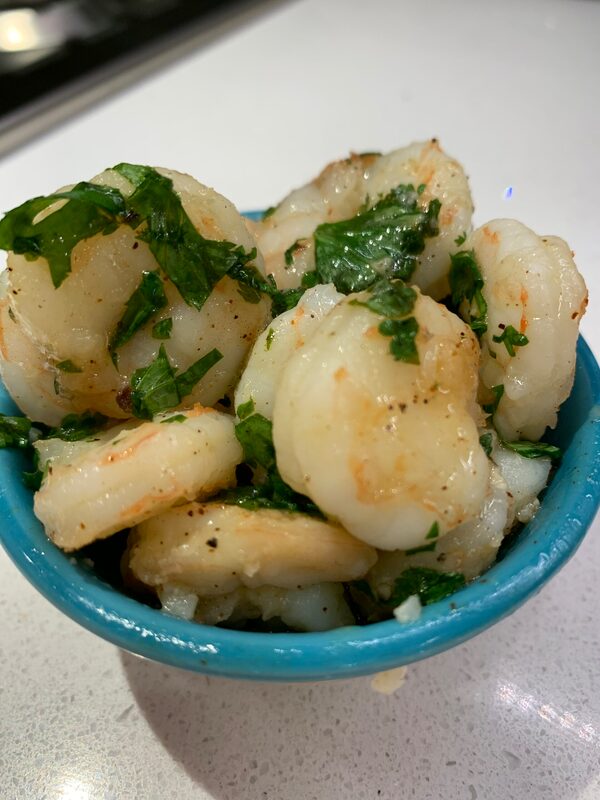 If you like a little spice and a little tang you are going to love this honey chipotle lime shrimp! It can be as spicy as you like it depending on how much chipotle chili powder you add. We have a divided household on spice. 2 of the members in my family don’t like very much spice at all. The third one can handle a little spice but not Thai Hot by any means. The 4th person eats Thai hot food and loves most spicy things. We are an interesting bunch when it comes to spice! What Do You Need to Make This Honey Chipotle Lime Shrimp? This is the best part of the recipe…besides how yummy it is! It only requires a few ingredients! 1 LB Sweet Pink Shrimp- peeled and deveined 2 limes- zested and juiced 1 handful of fresh Cilantro chopped 1/4 Cup of Honey 1/4-1/2+ tsp Chipotle Pepper Powder S &P Boom- cook the shrimp throw the rest in the pan and dinner is ready! Haha! Almost that easy. Sauté the shrimp in a pan with a little bit of olive or avocado oil. Add S & P as well as the chipotle pepper powder. Stir. Add the lime juice and zest. Stir. Add the honey and stir. Your shrimp should be opaque or almost cooked so add the cilantro. Serve it as an appetizer or over some rice or cauliflower rice! Yummy! Pin This Now So You Can Make It Later! 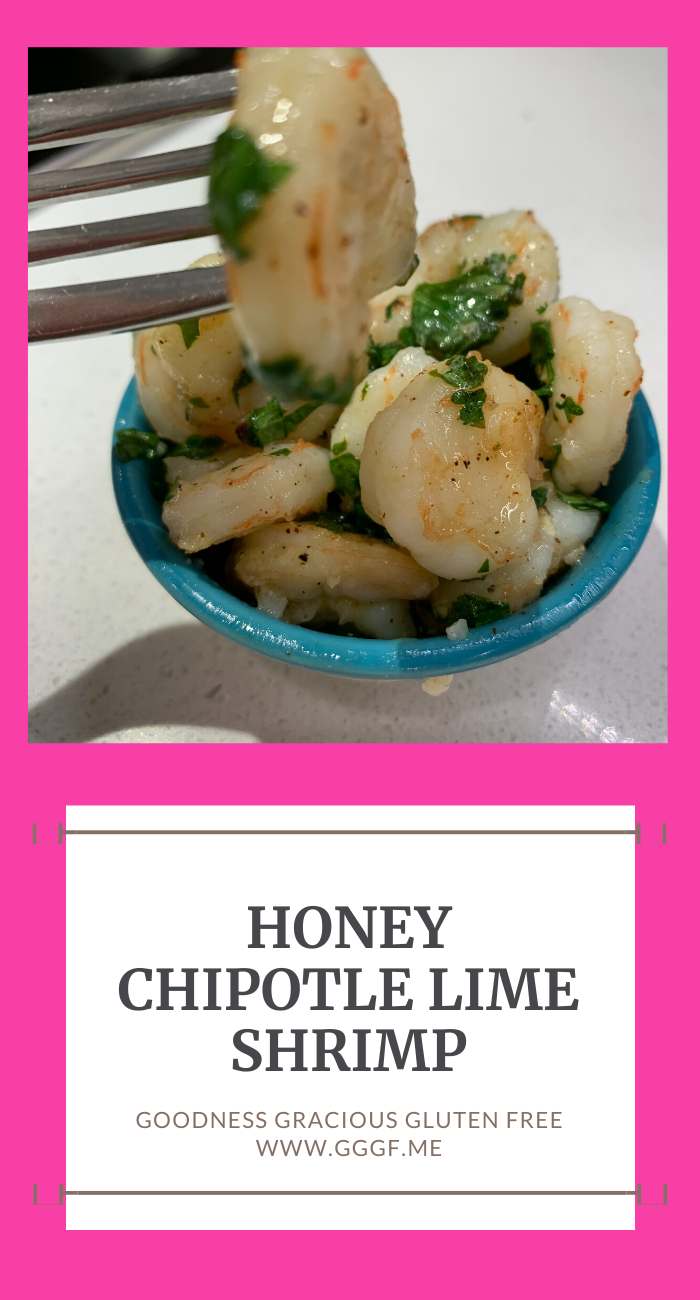 Here’s The Recipe for The Honey Chipotle Lime Shrimp: Honey Chipotle Lime ShrimpDo you need a fast and easy dinner? This whips together in 10 minutes and is packed with flavor. SERVINGS 4 people INGREDIENTS
INSTRUCTIONS
Thanks for Visiting GGGF.ME! Don’t forget to subscribe so you don’t miss a thing! Also, send me a picture of the recipes you try so I can see how they turned out! As Always, Best Wishes for Gluten Free Dishes! XO, Michelle This gluten free pecan crusted tuna with mango salsa is so fantastically delicious! You could serve it as an appetizer or as the main course! 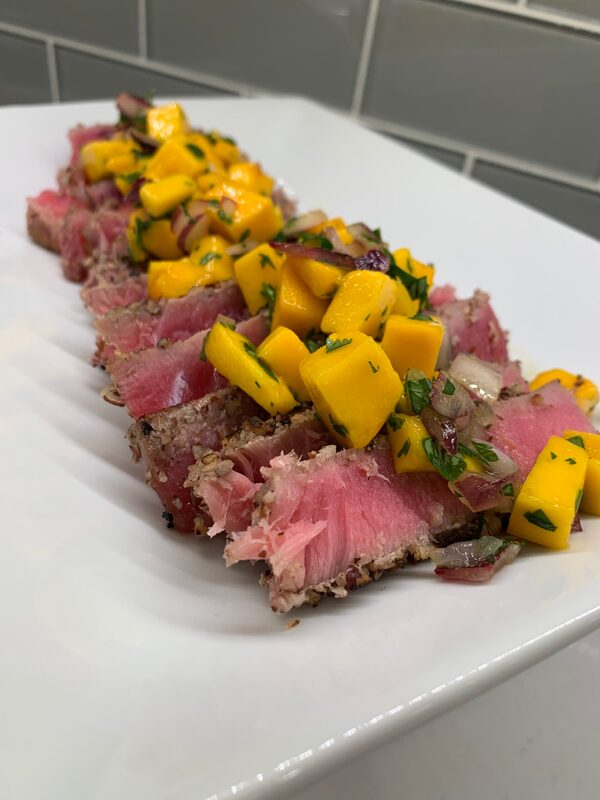 I Know What You Should Be Making For Dinner Tonight! Delicious Pecan-crusted Tuna with mango salsa! That’s what you should be having for dinner! It is so easy to make and is definitely a weeknight-to-date night meal. If you don’t have tuna fillets on hand you could also substitute the fish with any light fish you like. Mahi Mahi would also be yummy! You could make this meal go further by serving the pecan crusted tuna with mango salsa over some rice, cauliflower rice, a big salad, or with any veggie you like. Just seeing this photo makes me want to make this for dinner tonight. Here’s What You Will Need to Make This Tuna with Mango Salsa: 1 Ahi Tuna Steak per person- depending on the size of the fillet:) 2 Mangos that are ripe 1 Handful of Cilantro 1 Red Onion 2 Limes Pecans Salt and Pepper First, you will need to toast the pecans in a pan until they are fragrant and set them aside. If you try to chop them when they are hot you could burn your fingers…. and that would slow you down from eating this delicious pecan crusted tuna with mango salsa. Next Up Make the Mango Salsa- If you have never peeled a mango check this out https://www.youtube.com/watch?v=yE0NGXZ_HBs I personally like the chef snack part of the video :) The salsa is mangos, red onion, cilantro, lime juice, and SNP. Mix it all together and set it aside. Once the pecans are cooled, chop them super fine so they will stick to the fish. Take the fish out of the fridge and pat it dry with a paper towel. Press the fish into the pecans and SNP. Coat it on all sides. Fry the fish in a hot skillet until seared on each side- about 2-3 minutes depending on how rare you like your fish. Let the fish rest for a few minutes so you don’t burn your fingers. Like I stated above this will slow you down from eating this delicious pecan crusted tuna with mango salsa. Slice the fish against the grain and layer it on a plate. Spoon the mango salsa over the top. Now the best part……enjoy eating it! Save This Now Make it Later 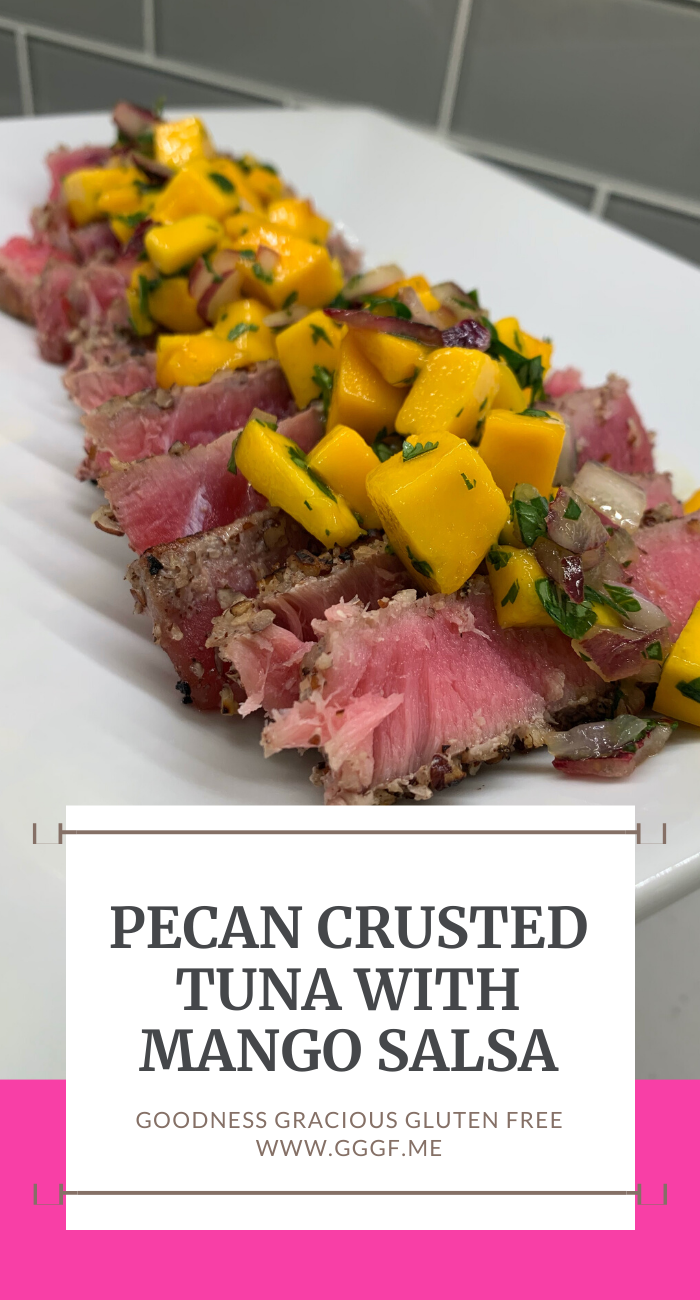 Here’s A Video on How I Made This Tuna with Mango Salsa: If You Like This RECIPE You Might Like:
Caribbean Chicken Lettuce Wraps Crunchy Thai Cabbage Salad Here’s The Recipe: Pecan Crusted Tuna with Mango Salsa Fast and delicious healthy meal that goes from weeknight to date night. Print Recipe Pin Recipe INGREDIENTS
Hope You Are Doing Well-Hoping everyone is doing well out there in the world! It’s crazy times with Covid and being asked to stay home! Stay Healthy and I hope you are all doing good. Check out my Instagram page to see what we are up As Always, Best Wishes for Gluten Free Dishes! XO, Michelle This healthier gluten free mac n cheese is a more nutritious spin on classic mac n cheese from a box! 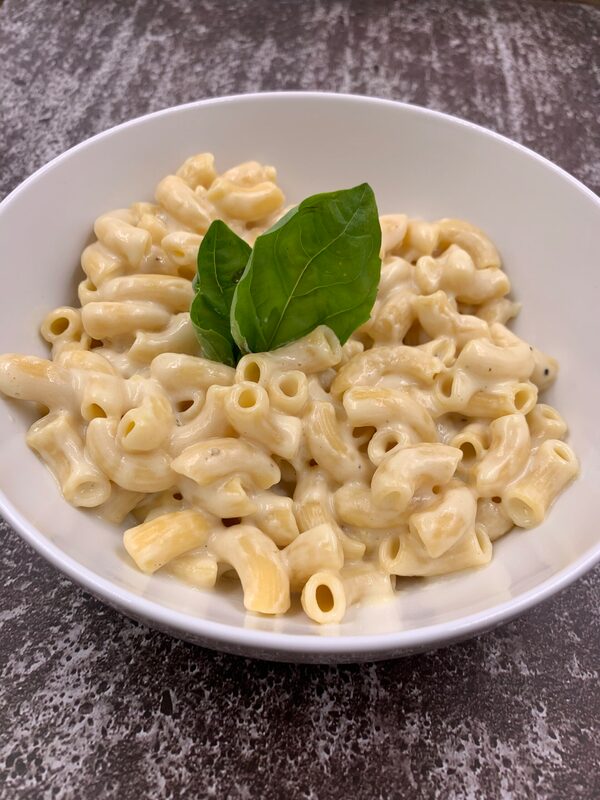 Are You Craving More Comfort Food Right Now? If you are like most people, you are craving more comfort foods during this time of uncertainty in our world. It is totally normal to want warm and deliciously cheese pasta in our bellies when our world has turned upside down. If you want a healthier version of mac n cheese I got you covered! This recipe is super easy and takes the same amount of time to make as the blue boxed version. What Do You Need to Make this Healthier Mac N Cheese? Here’s the best news! You only need a few ingredients to make it and no crazy kitchen gear either! You will need: 1 Cup of Milk 4 TSP Flour- I used my gluten free flour blend 1/4 TSP of Salt 1/3 Cup of Packed Cheddar Cheese- That means you squish as much as you can into the 1/3 measuring cup. A Pinch of S&P. 1 Box of Banza Protein Pasta– You can choose the shape. There is also a red lentil pasta with similar amounts of protein that would work perfectly. Who doesn’t love getting 23ish G of Protein from the pasta alone! Pin THIS and make it later! Ways You Could Make This Even BETTER! I know it’s hard to imagine ways to make this better, but trust me there are a few options! Here are a few of my favorite without sounding like Forrest Gump Haha! You could add: Chopped Chicken Bacon Chicken and Bacon Broccoil Any other veggies you like Fajita meat with peppers and onions Pureed Butternut squash- Your kids won’t even know Tuna The list goes on and on and on…. mac n cheese… mac n cheese… Here’s The Video On How to Make This Healthier Mac N Cheese Here’s The Recipe:
Healthier Mac N CheeseAre you looking for a healthier version of Mac N Cheese that is easy to make? Look no further! INGREDIENTS
INSTRUCTIONS
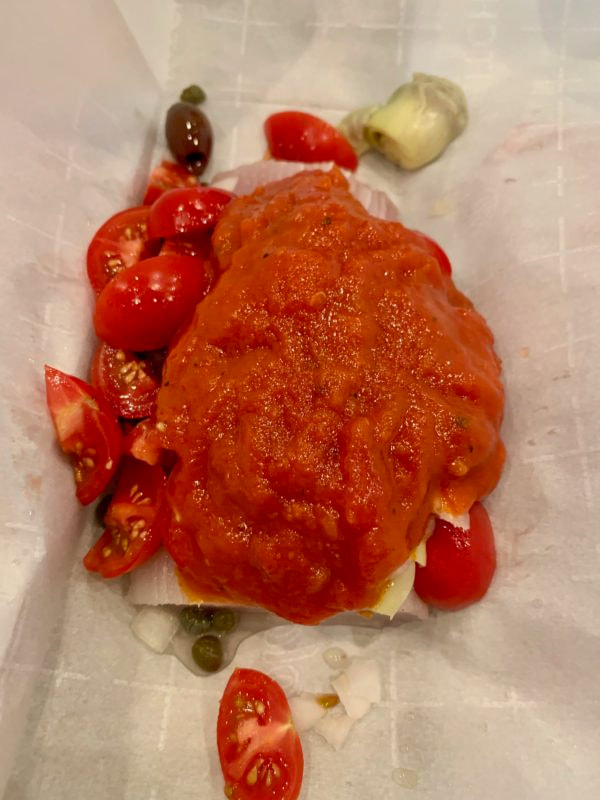
I hope you love this healthier version of mac n cheese! Hopefully you and your family are staying safe and healthy! Remember this won’t last forever.. keep your chin up As Aways, Best Wishes for Gluten Free Dishes! XO, Michelle Mahi Puttanesca is a fast and easy weeknight or weekend meal! All you need is a few key ingredients, some parchment paper to wrap them in, and an oven. Voila! Dinner is ready. 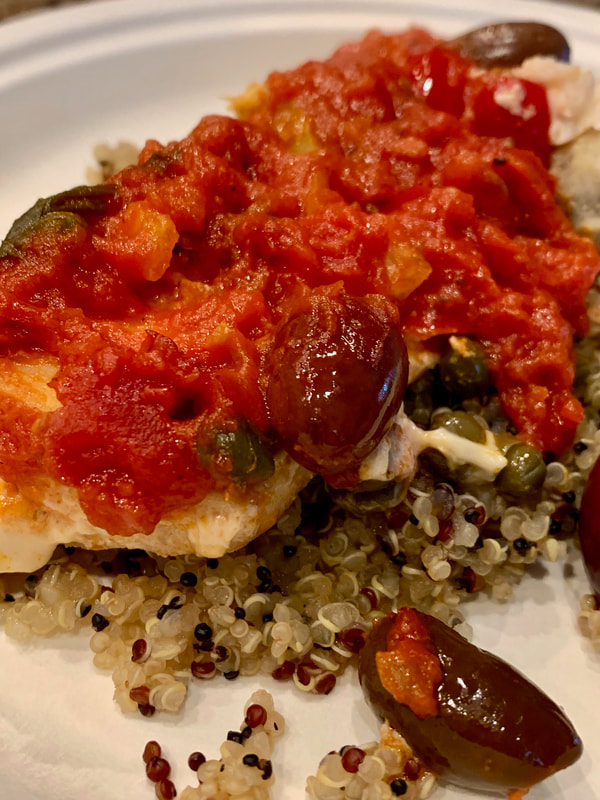 If you serve this dish to guests they will think it’s super fancy but we can keep the secret that it’s really very easy! haha! What is Puttanesca Anyway? Puttanesca is the name of a tomato based sauce made in Italy. It has a colorful past in how it got its name. One variation is that Puttanesca sauce was named after ladies of the evening and it was a quick meal they could throw together in between customers. Ladies of the evening were called Puttana. Hence Puttanesca. Another idea behind the name was that it is a sauce containing leftovers and everything in the kitchen. AKA the whore of sauces. I love the sauce and that you can add more or less of your favorite ingredients and customize it to your liking. So regardless of where the name came from it is still one of my favorites! You can serve the sauce over pasta, chicken, or fish. It is very versatile. Mahi Puttanesca is very flavorful without being overly fishy tasting. What do I need to make this fancy sauce? This is the best part and why you are going to fall in love with this sauce! You can throw together whatever ingredients you love and have on hand. Here is what went into my Puttanesca sauce: One Jar of Marinara Sauce- I love Rao’s. 1 jar of capers- use however many you would like. Kalamata Olives or any olive variety Chopped Yellow onion Chopped Red onion Artichoke Hearts- mine were in a jar Tomatoes that are chopped Minced Garlic Salt and Pepper And of course the Mahi Mahi. I started out by placing 4 pieces of parchment paper on a baking sheet. Then fold the parchment paper into a rectangle and drizzle a little olive oil and put the fish on the paper. SEE HOW I FOLDED THE PAPER HERE: Then I put the rest of the ingredients over the fish and folded the packets to seal them. 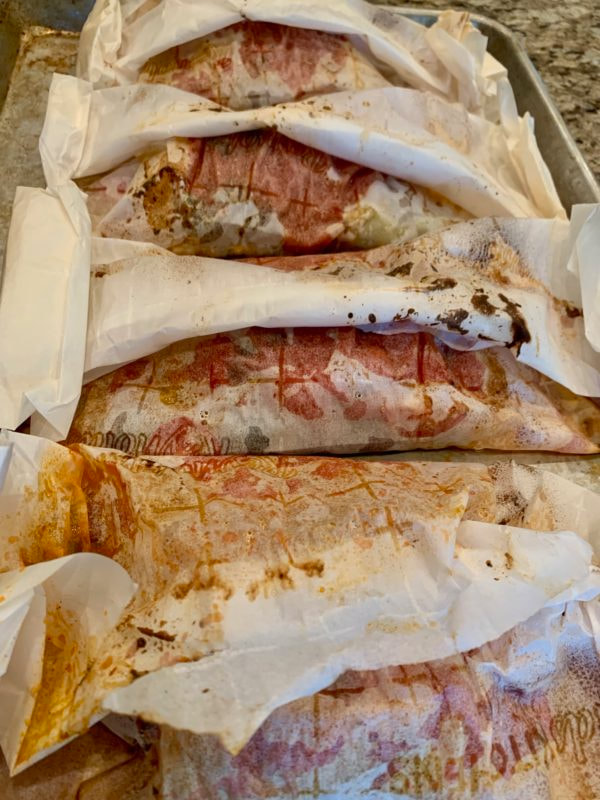 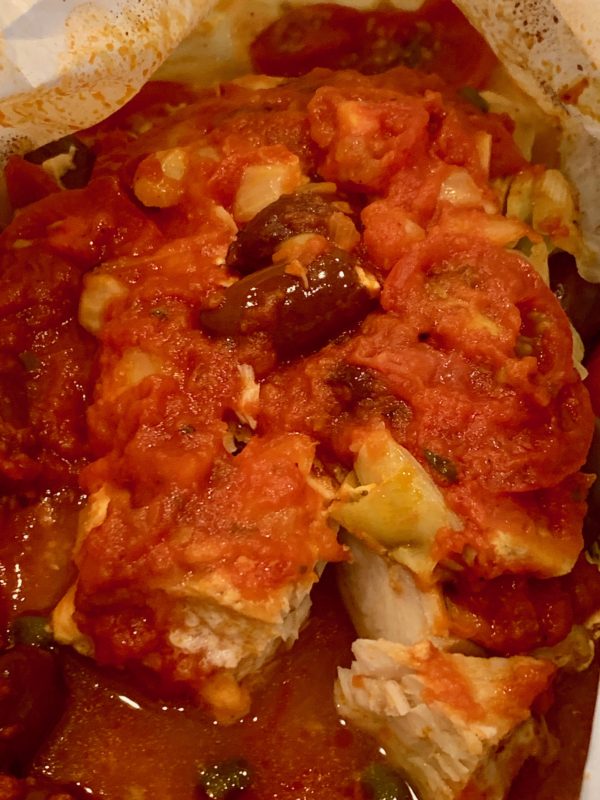 I baked it in the oven at 350 degrees for about 25 minutes. The fish was cooked perfectly and was so YUMMY! I served it over Quinoa and with a big salad! You might also like to pair this with my delicious Mashed Cauliflower to keep it lower carb. If you change the protein to chicken, you will need to add additional time for cooking. I would use a meat thermometer to make sure your chicken is cooked but it should take about 40 minutes. PIN NOW! Make it later!  Here’s The Recipe Mahi Puttanesca
This recipe is easy to make and delicious to eat! SERVINGS 4 people INGREDIENTS
INSTRUCTIONS
Hope you enjoy this recipe and make it often as we do! As Always, Best Wishes for Gluten Free Dishes! XO, Michelle |

Hey There!I am so glad you are here! Categories
All
Archives
June 2023
|

 RSS Feed
Click to upload Footer Background below