|
Gluten Free Arepas are super easy to make and have been made popular lately by the Disney movie Encanto! Have you seen it yet?

Here’s what you need to make gluten free arepas:You will need a bag of GOYA Masarepa or PAN White Cornmeal that is precooked.
I used the Goya Masarepa flour to make these babies! These two work the best for making them IMO. Warm Water Salt If you want to make them with a cheese filling you will need shredded cheese or queso fresco or your favorite cheese! I also like to fill them with shredded meat, avocado, and shredded cheese… yum! If you purchase the flour from my Amazon link, I will receive a small commission. Thank you! Here are my policies and disclosures:) I messaged my friend Gaby, who is from Columbia to ask her for her pro tips when making these! Thank you Gaby for your help! Here’s how to make them: I followed the instructions on the GOYA Masarepa package. I added on to it since it ended after making the dough lol. In a bowl, add 2 1/2 cups of warm water, 2 Cups of Masarepa, and 1 tsp salt (I did a pinch because I didn’t measure it lol) Stir together until combined. Let it sit for 5 minutes. After the 5 minutes, USE WET HANDS to knead the dough. I kneaded it on a Silpat mat so it wouldn’t stick. Start heating your skillet with some olive oil in it. If you are not adding cheese as a filling, form them into thick pancake shapes. If you are adding cheese filling, hold the pancake-like shape in the palm of your hand and make a little well. Put the cheese in there. Cover the cheese up with a little dough. Press the dough all around it so none will come out during cooking. If the dough gets sticky, wet your hands again. This really helps! Once you have them made, pan fry them for about 3-4 minutes per side until they are browned and cooked through. The cheese filling ones will have melty cheese on the inside! Continue until all of them are cooked. Once they are cooled a little, you can cut them 3/4 of the way around and add the shredded meat to them or your favorite stuffing ingredients. You might also like Gluten Free Empanadas! Pin this now and make it later! 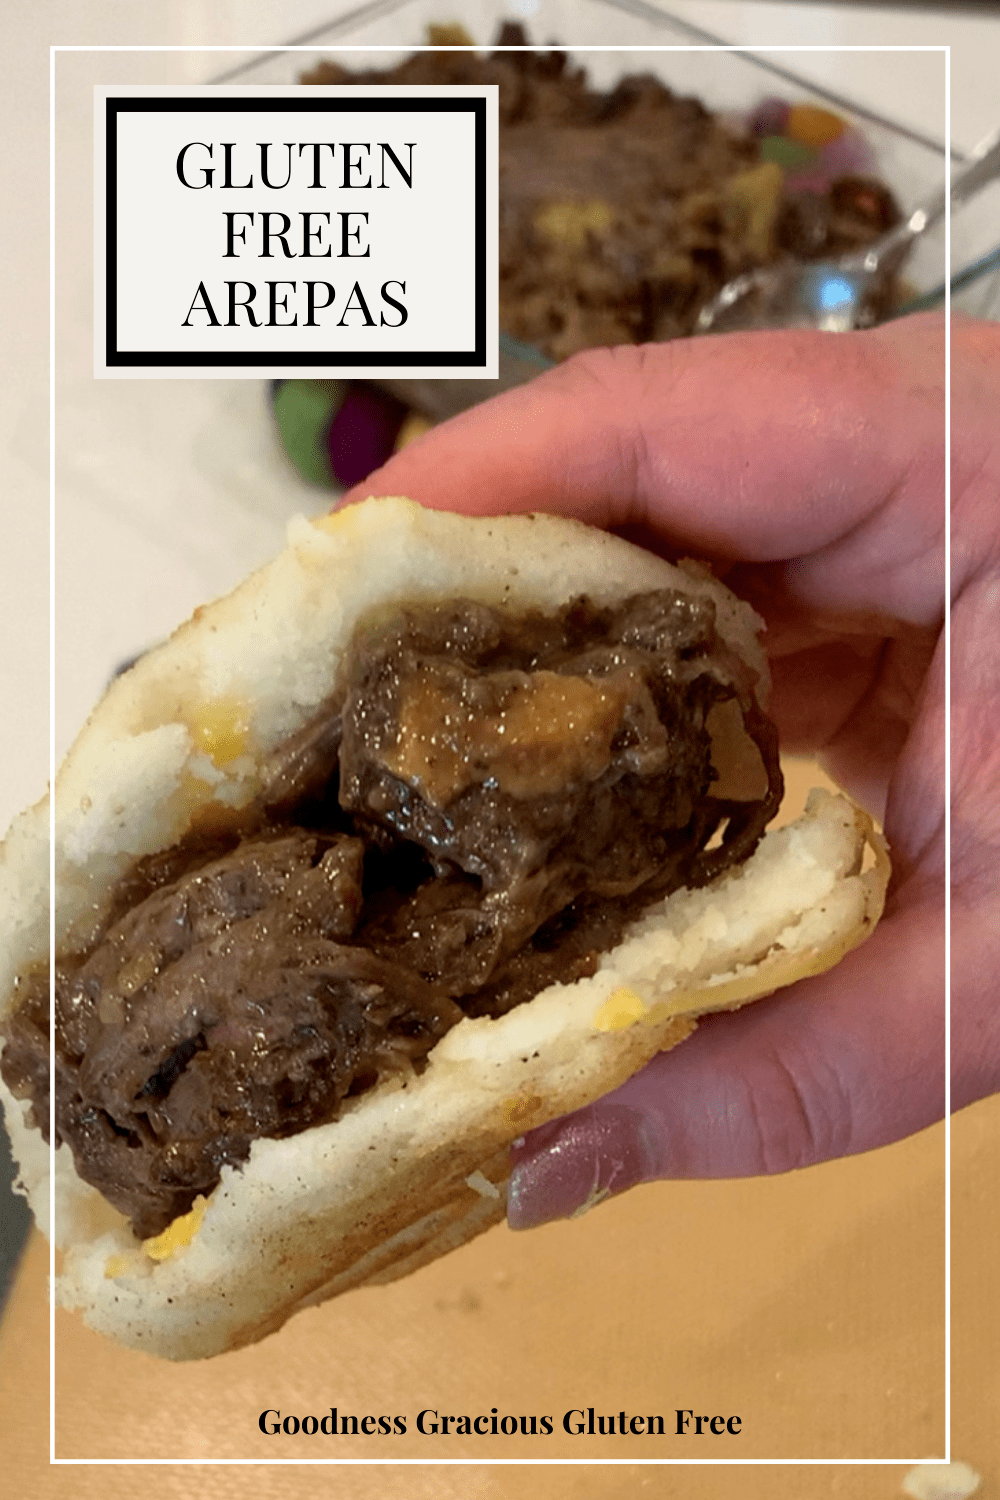
Here’s some Arepa filling ideas:
Shredded Beef- I used leftover Pot Roast Meat and it was yummy! Shredded Chicken- I like to make Salsa Chicken in my Instant Pot for this! Avocado or Guacamole Black Beans Cheese Butter Ham, Pickles, and Cheese- kind of like a Cuban Sandwich (I got the idea from Quiero Arepas) Breakfast ingredients such as eggs, sausage, and cheese. We went to Quiero Arepas when we were in Denver and I loved the Pollo Guisado one we had there! If you are looking for more ideas of where to eat in Denver check out my Gluten Free Guide to Denver! Here's The Video of How To Make These Delicious Arepas!
prep time: 15 MINUTES
cook time: 15 MINUTES total time: 30 MINUTES These gluten free arepas are super easy to make and delicious! You can fill them with shredded meat, cheese or your favorite fillings! Ingredients
I followed the instructions on the GOYA Masarepa package. I added on to it since it ended after making the dough lol. In a bowl, add 2 1/2 cups of warm water, 2 Cups of Masarepa, and 1 tsp salt (I did a pinch because I didn’t measure it lol) Stir together until combined. Let it sit for 5 minutes. After 5 minutes, USE WET HANDS to knead the dough. I kneaded it on a Silpat mat so it wouldn’t stick. Start heating your skillet with some olive oil in it. If you are not adding cheese as a filling, form them into thick pancake shapes. If you are adding cheese filling, hold the pancake-like shape in the palm of your hand and make a little well. Put the cheese in there. Cover the cheese up with a little dough. Press the dough all around it so none will come out during cooking. If the dough gets sticky, wet your hands again. This really helps! Once you have them made, pan fry them for about 3-4 minutes per side until they are browned and cooked through. The cheese filling ones will have melty cheese on the inside! Continue until all of them are cooked. Once they are cooled a little, you can cut them 3/4 of the way around and add the shredded meat to them or your favorite stuffing ingredients. © Michelle Bock I wish I could heal the world with my food like Julieta’s arepas did in Encanto! Sadly I can’t, but I hope you enjoy the recipe! As Always, Best Wishes for Gluten Free Dishes! XO, Michelle
0 Comments
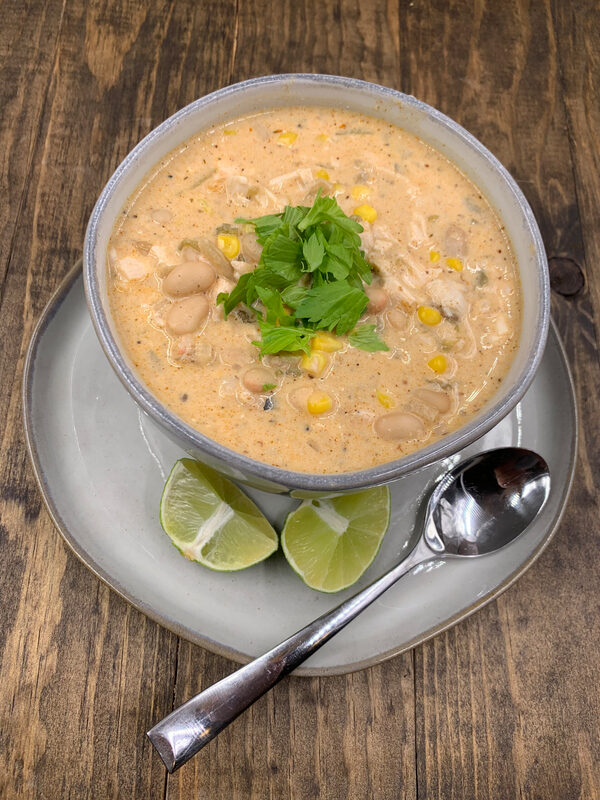
Hey there! White Chicken Chili is perfect for cold days. I just made this for my daughter’s graduation from college and it was a crowd-pleaser! It’s super easy to make in your Instant Pot or Crockpot!
What Do I Need To Make This?
1 Small Yellow Onion, diced 1 TBS Olive Oil 2 cloves of Garlic, finely minced (2) 14.5 oz cans of Chicken Broth (1) 7 oz can of Diced Green Chiles 1 1/2 TSP Cumin 1/2 TSP Sweet & Smokey Paprika 1/2 TSP Fresh Cilantro 1/4 TSP Cayenne Pepper 1/2 TSP Dried Oregano Salt & Pepper to taste (1) 8oz package of Cream Cheese cut into small cubes 1 1/4 c of fresh Corn or frozen corn (2) 15 oz cans of Cannellini Beans 2 1/2 c of Shredded Cooked Rotisserie Chicken 1 TBS Lime Juice Here’s How To Make This Recipe: Put your Olive Oil, Onions, and Garlic in your Instant Pot on “Saute” mode or ~5 minutes until the onion and garlic start to turn soft. Add Chicken Broth, Green Chilies, Cumin, Paprika, Oregano, Cayenne Pepper, Salt, and Pepper. Turn the Instant Pot off of saute mode. Put the lid on and start it on Manual Pressure but turn the time down to 10 minutes. Once it is finished, release the pressure carefully. Drain and rinse Beans in a fine mesh strainer or colander. Measure out one cup of the beans and set aside. Puree the one cup of beans and a little broth from the soup until nearly smooth. This will thicken the soup. Add it to the instant pot with the non pureed beans. Add Cream Cheese, Chicken, Corn, and Lime Juice to the instant pot. Stir. You can serve the soup now, or close the lid and keep on the warm setting until you are ready to eat! Serve with toppings of your choice. How to make White Chicken Chili Dairy Free? This recipe calls for cream cheese but you can substitute it for dairy free cream cheese if you need to. Top it with your favorite shredded dairy free cheese as well! Can I make this White Chicken Chili with frozen chicken? Yes, just increase the time you cook it in the instant pot but I don't recommend it. I think the flavor is better with rotisserie chicken and highly recommend it! Pin it for later! 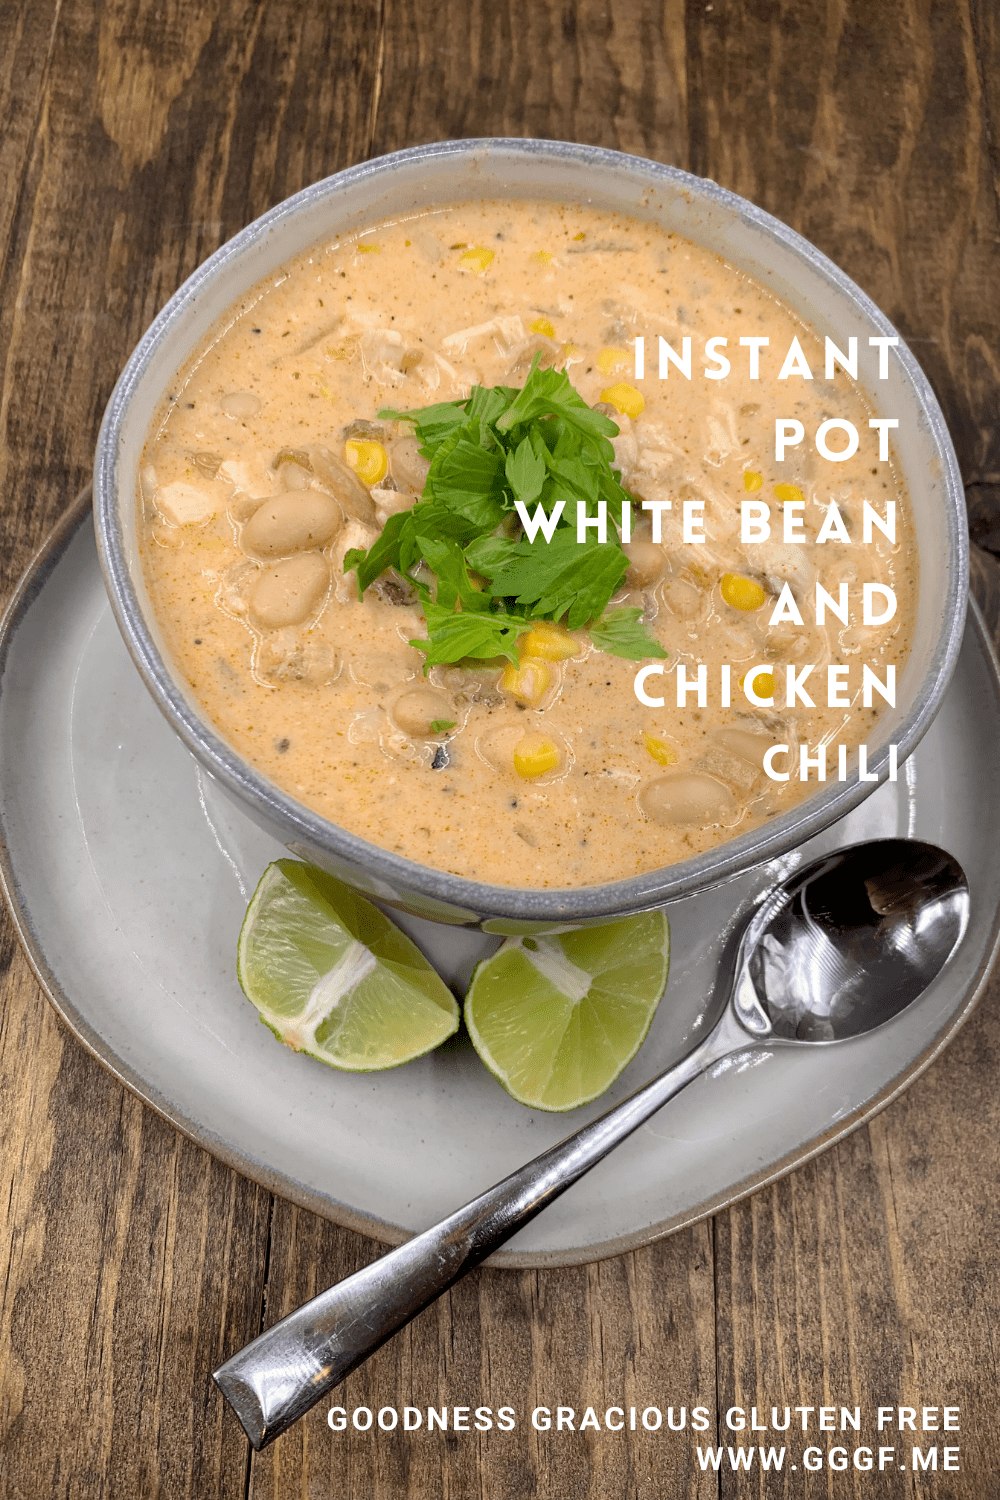
Toppings for this recipe:
Sour Cream- a classic, you can use dairy free if you need to. Avocado Shredded Cheese- use dairy free if you need to. Tortilla Chips- for extra crunch. Jalepenos-if you need a bit more spice. If You Like This Recipe You Might Also Like These: GLUTEN FREE AND KETO CORNBREAD– to go with your chili. GLUTEN FREE CHILI IN MY INSTANT POT! -for all your classic chili needs. GLUTEN FREE AVGOLEMONO SOUP– if you like chicken recipes. GLUTEN-FREE CHICKEN MEATBALL AND ZOODLE SOUP– for all your hearty and healthy needs. Here's a video...
prep time: 15 MINUTES
cook time: 10 MINUTES additional time: 30 MINUTES total time: 55 MINUTES This hearty and delicious white chicken chili is perfect for cold days that you crave comfort food! I recently made it for my daughter's winter graduation party! It was a crowd-pleaser! Top it with your favorite toppings- so very yummy! Ingredients
I hope you enjoy this White Chicken Chili! As Always, Best Wishes for Gluten-Free Dishes! XO, Michelle
I love this spicy Sicilian chicken soup when I am craving comfort food or if I am not feeling well! There’s something about eating a little spice if you have a stuffy nose that helps IMO!
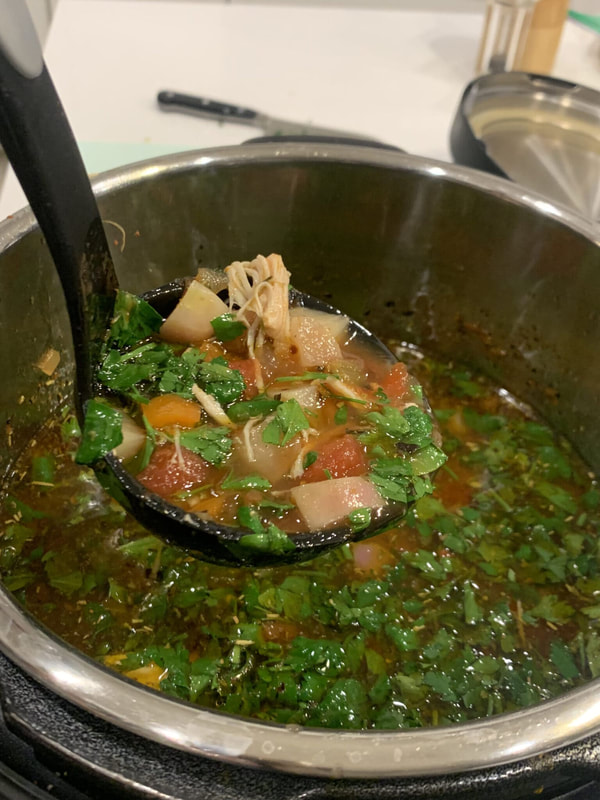
I used to love getting this soup before I knew that I had Celiac Disease! It was perfect on a cold day or if I was feeling under the weather!
I no longer eat at Carrabba’s because I have been glutened there twice! So, I no longer trust them. This lead me to create my own version from my memory of what it tasted like! What do I need to make this Spicy Sicilian Chicken Soup? You will need the following ingredients to make this recipe: 1 bag of frozen mirepoix or fresh mirepoix olive oil red pepper 2 medium sized red potatoes or 1 cup of diced radishes if you are eating keto. Tomato paste chicken stock- homemade or from a store. chicken breasts or rotisserie chicken can of chopped tomatoes parsley pepper salt Italian seasoning red pepper flakes garlic cloves and an instant pot or a crockpot.
How do I cook it in the Instant Pot VS the Crockpot? I cooked it on the soup mode of my instant pot. I made it with raw chicken and it turned out perfectly. If you use the rotisserie chicken you would not need to cook it as long. Probably only 10-15 minutes. If you are using a crockpot or slow cooker, I would cook on low for 8 plus hours. Tips for making this Spicy Sicilian Chicken Soup- If you are using raw chicken, it will take longer to cook. I removed the chicken after it was finished cooking and shredded it and returned it to the pot. If you use rotisserie chicken, it will cook faster. You can shred it before adding it to the instant pot or crockpot. If you want it spicier, add more red pepper flakes and black pepper. I did not add pasta to mine as we are eating keto, however, you could add pasta to your soup if you like. I also substituted radishes for the potatoes to make it keto friendly. If you like this recipe you might also like these: My Grandma’s Vinarterta Instant Pot Fajita Chicken Corn and Potato Chowder Pin This NOW make it Later! 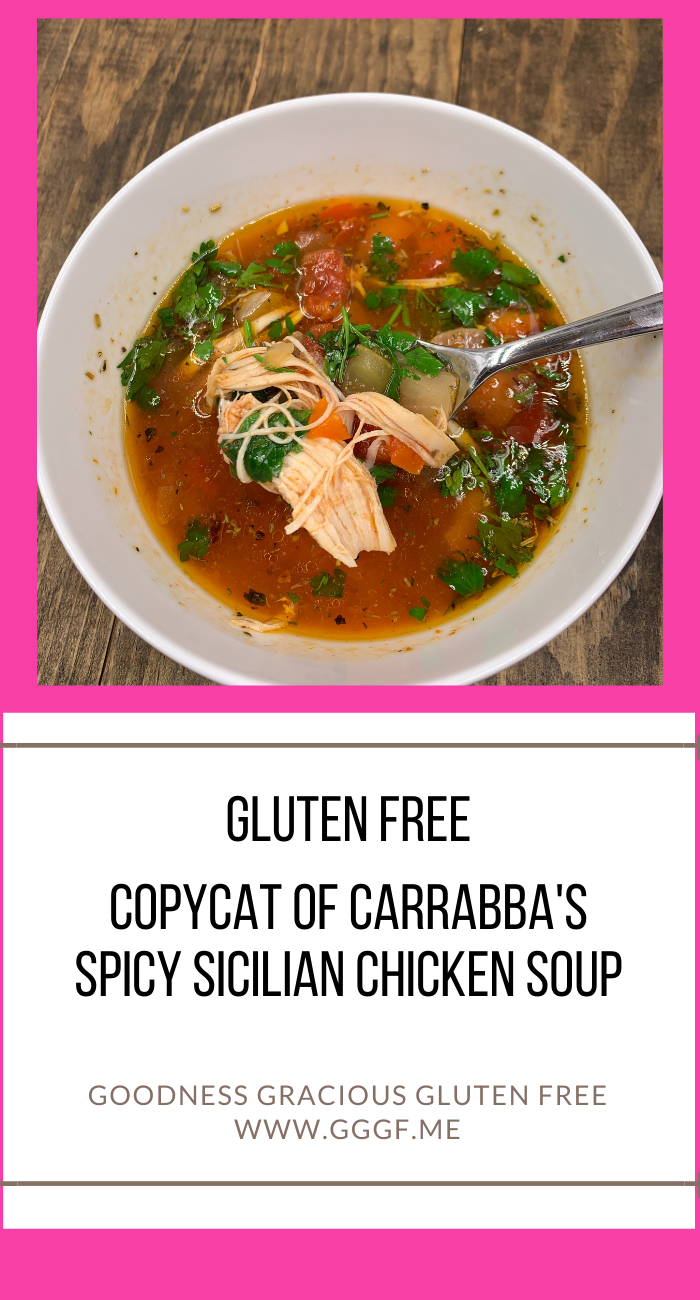
Here’s the video on how I made it :)
Here’s the recipe:
Spicy Sicilian Chicken Soup- Carrabba's Copycat prep time: 15 MINUTES cook time: 45 MINUTES total time: 1 HOUR This delicious Carrabba's copycat Spicy Sicilian Chicken Soup is perfect for cold days or when you are feeling under the weather! It can be made more or less spicy! It can be made in the Instant Pot or Crockpot. Yummy! Ingredients
If you make this recipe please tag me on Instagram! I would love a 5 star review! TIPS: If you are using raw chicken, it will take longer to cook than rotisserie. I removed the chicken after it was finished cooking and shredded it and returned it to the pot. If you use rotisserie chicken, it will cook faster. You can shred it before adding it to the instant pot or crockpot. If you want it spicier, add more red pepper flakes and black pepper. I did not add pasta to mine as we are eating keto, however, you could add cooked pasta to your soup if you like. I also substituted radishes for the potatoes to make it keto friendly. I hope you love this copycat of Carrabba’s Spicy Sicilian Chicken Soup! As Always, Best Wishes for Gluten Free Dishes! XO, Michelle
If you are looking for a delicious seafood dinner look no further! This crab stuffed lobster hits it out of the park!
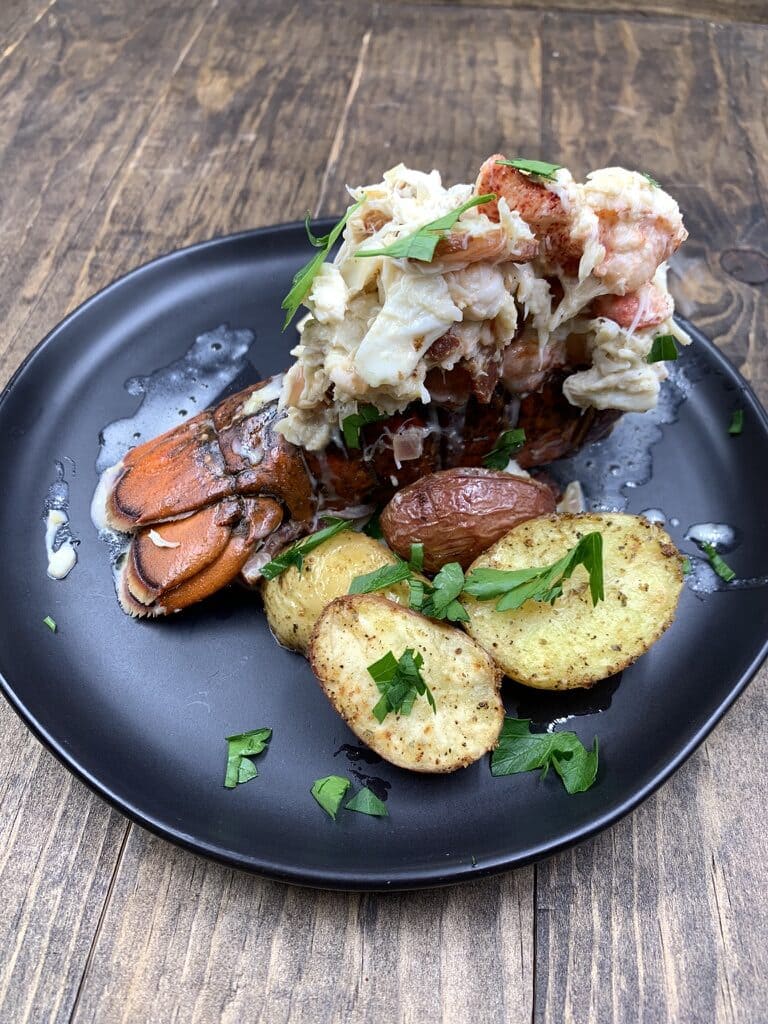
This crab stuffed lobster might be my favorite seafood meal ever!! We ate at the Atlantic’s Edge Restaurant in the Cheeca Lodge and ordered this meal! I loved it so much that I wanted to make a copycat version of it!
Let me tell you about this recipe! We went to the Florida Keys earlier this year and stayed at the Cheeca Lodge. Such a cute resort with lots to do! We ate at the Atlantic’s Edge Restaurant and ordered their crab stuffed lobster. OMGOSH! It was so fantastic! I decided to try to copycat the recipe when we got home because it was so yummy! I also didn’t know when we would be going back to Florida! They served the crab stuffed lobster on top of mashed potatoes however, I thought the crispy potatoes would go perfectly with this dish too! What do I need to make this crab stuffed lobster? You will need the following ingredients: Lobster tails Crabmeat with shells removed and cleaned- not the fake crab. Butter White Wine- I used Pinot Grigio. Bacon Shallots Heavy Cream Parsley Salt and Pepper Mini Potatoes- omit these if you are keeping it keto :) Italian Seasoning Garlic Olive Oil Lemons Here’s how to make this recipe: This recipe is for 6 people assuming each person would eat one lobster tail. If you have hungry people it will feed fewer people. Start off by washing your mini potatoes. Chop them in half. Place them on a baking dish. Drizzle them with Olive Oil. Season them with S&P, Italian Seasoning, and Garlic Powder. Bake them in a 425 oven until they are golden brown and a little crispy. This took me about 30 minutes. While your potatoes are cooking, start on the lobster tails. Cut down the middle of the shell on the tail. You can see how I did this in the video below Pull the lobster meat out and on top of the shell. Place them in a baking dish. Put a pat of butter on top of each lobster. Season with Salt and Pepper. Add some white wine to steam them. Bake in the oven at 425 degrees until they reach 130 degrees internal temperature. While the lobster and potatoes are cooking, let’s start on the crab stuffing. It’s a bit of a long process, but it’s worth it!Chop the bacon into small pieces. In a deep frying pan cook the bacon until it’s crispy. Once it’s crispy, remove it from the pan and put it on a plate with a paper towel to rest. Drain most of the bacon fat from the pan. I will let you decide how much to keep or leave Add a drizzle of olive oil and butter. Melt the butter. Add in the shallots and garlic. Sautee. Add in the wine. Stir. Add in the lemon juice. Stir. Simmer until it has reduced by half. Add in the extra lobster meat. Sautee it for a few minutes. Add the crab meat. Continue to stir. Add S&P Pour in the heavy cream. Stir. Add back in the bacon and stir. Remove from heat. The lobster and potatoes should also be finished now. Pour the crab stuffing over the lobster tails. OPTION- You can remove the cooked lobster meat and chop it up and then put it back in the tail first. I didn’t do this because I like the look of it on top of the lobster shell. Sprinkle it with chopped parsley. Add the crispy potatoes to the plate as you serve it. Enjoy! Pin Me Now Make Me Later! 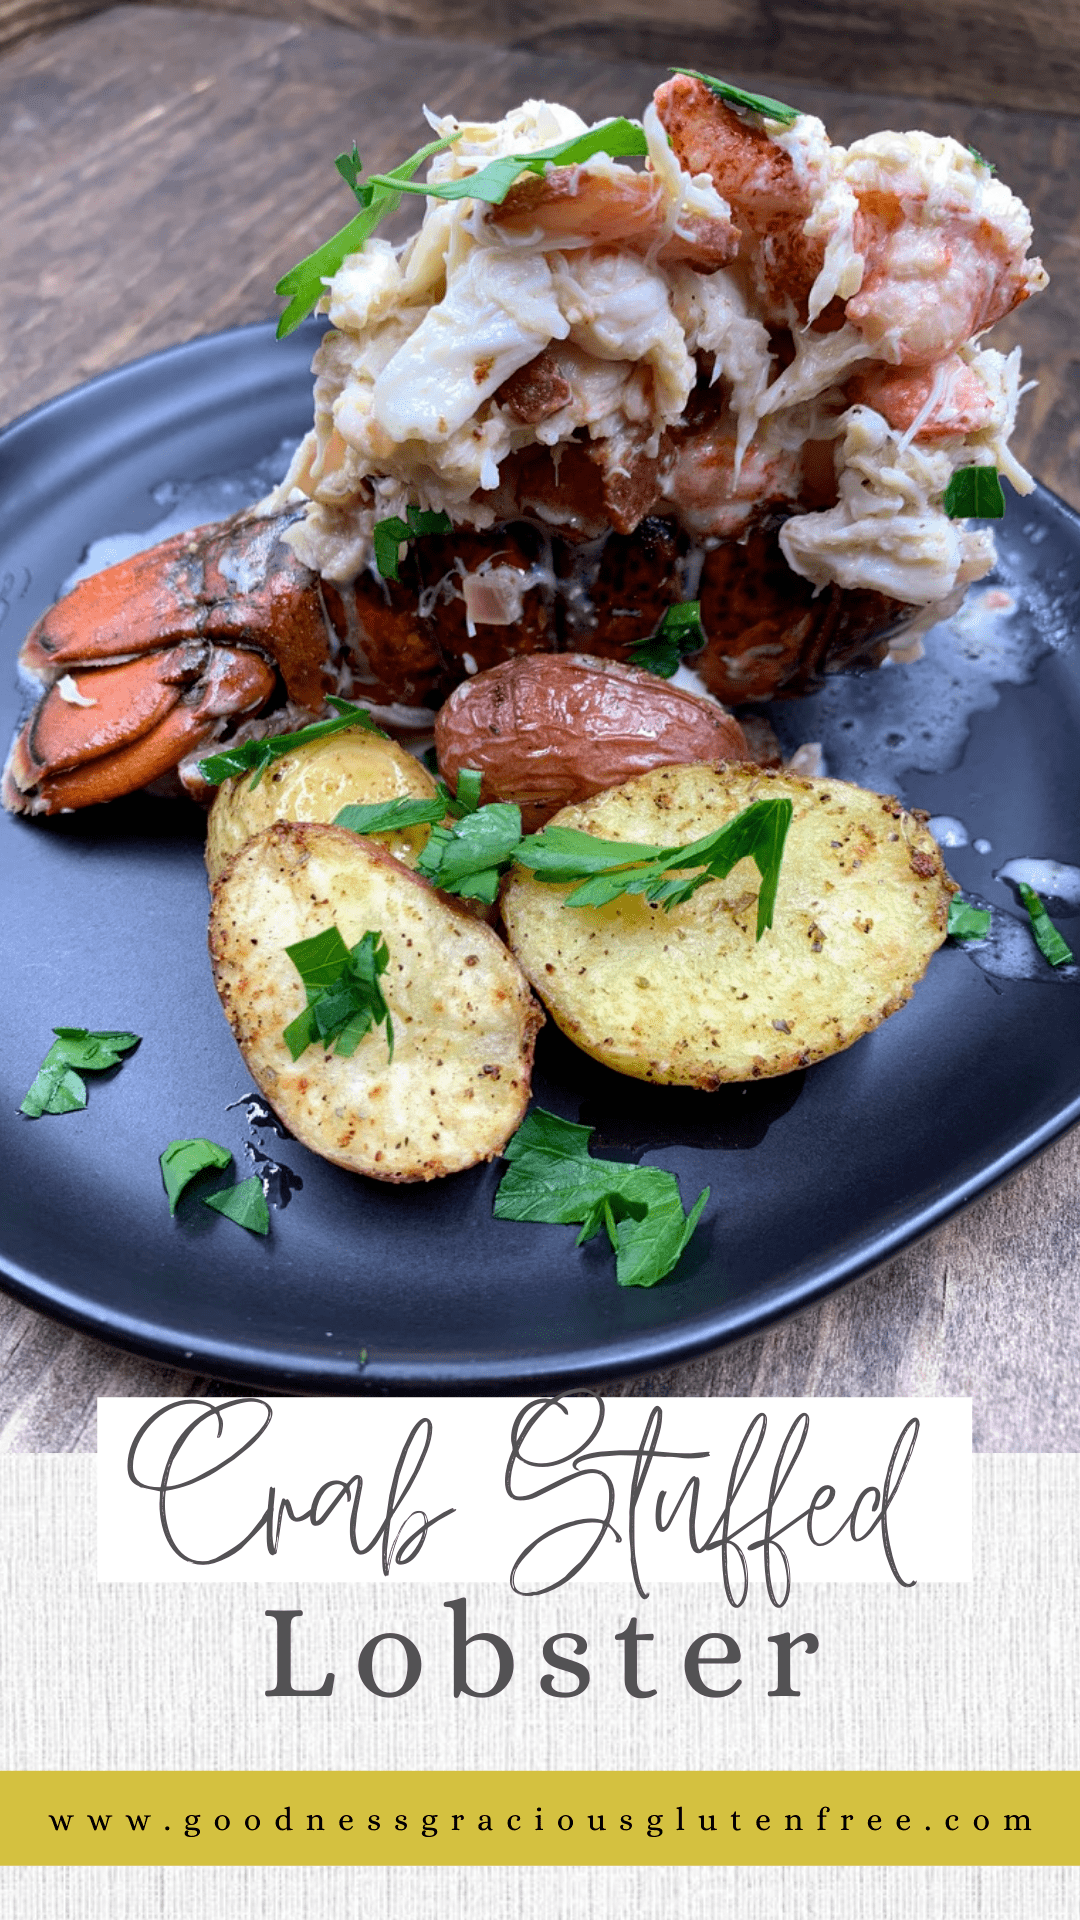
Here’s the video on how to make this crab stuffed lobster:
If you like this recipe, you might also like these recipes:
Gluten Free and Keto Paella Easy Shrimp Ceviche– Gluten Free Gluten Free Pecan Crusted Ahi with Mango Salsa prep time: 30 MINUTES cook time: 40 MINUTES total time: 1 HOUR 10 MINUTES This crab stuffed lobster is my copycat version of the Atlantic's Edge Restaurant at the Cheeca Lodge's dish! So Yummy! Ingredients
Instructions This recipe is for 6 people assuming each person would eat one lobster tail. If you have hungry people it will feed fewer people. Start off by washing your mini potatoes. Chop them in half. Place them on a baking dish. Drizzle them with Olive Oil. Season them with S&P, Italian Seasoning, and Garlic Powder. Bake them in a 425 oven until they are golden brown and a little crispy. This took me about 30 minutes. While your potatoes are cooking, start on the lobster tails. Cut down the middle of the shell on the tail. You can see how I did this in the video below Pull the lobster meat out and on top of the shell. Place them in a baking dish. Put a pat of butter on top of each lobster. Season with Salt and Pepper. Add some white wine to steam them. Bake in the oven at 425 degrees until they reach 130 degrees internal temperature. While the lobster and potatoes are cooking, let’s start on the crab stuffing. It’s a bit of a long process, but it’s worth it! Chop the bacon into small pieces. In a deep frying pan cook the bacon until it’s crispy. Once it’s crispy, remove it from the pan and put it on a plate with a paper towel to rest. Drain most of the bacon fat from the pan. I will let you decide how much to keep or leave Add a drizzle of olive oil and remaining butter. Melt the butter. Add in the shallots and garlic. Sautee. Add in the wine. Stir. Add in the lemon juice. Stir. Simmer until it has reduced by half. Add in the extra lobster meat. Sautee it for a few minutes. Add the crab meat. Continue to stir. Add S&P Pour in the heavy cream. Stir. Add back in the bacon and stir. Remove from heat. The lobster and potatoes should also be finished now. Pour the crab stuffing over the lobster tails. OPTION- You can remove the cooked lobster meat and chop it up and then put it back in the tail first. I didn’t do this because I like the look of it on top of the lobster shell. Sprinkle it with chopped parsley. Add the crispy potatoes to the plate as you serve it. Enjoy! I hope you love this crab-stuffed lobster recipe as much as we do! I can’t wait to go back to Florida again and have it at the Cheeca Lodge, but until I do I will be making it at home! As Always, Best Wishes for Gluten Free Dishes! XO, Michelle
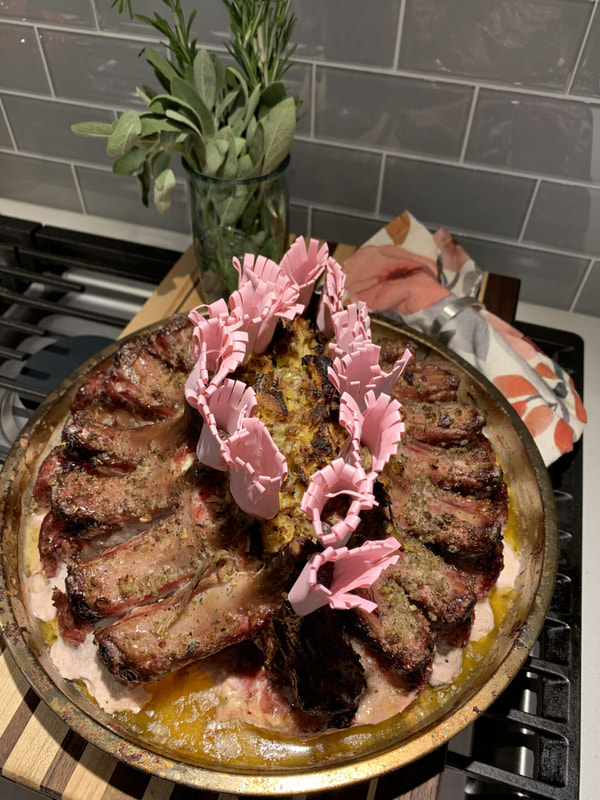
This smoked pork crown roast is delicious and it's easy to make! I love the slight citrus flavor from the dry brine!
This post may contain affiliate links. If you purchase something from the link, I will receive a small commission. Thank you! Here are my policies and disclosures.
What is a pork crown roast? A pork crown roast is a bone in pork loin that is not cut apart to form individual pork chops. It is cut partway through to allow it to form a circle. You cut between the chops and then tie the ends together. This smoked pork crown roast is super easy to make but I always feel fancy serving it! How long does it take to smoke? I had 2 frenched pork racks that were about 8 ribs each (total of 16) and it took a total time of 3 1/2 hours to smoke. We started at 225 degrees F then cranked it up to 450 degrees F for the last 45 min-1 hour. Just make sure to watch your thermometer in the meat as to not overcook it. Can I cook it in the oven? Yes! If you do not have a smoker, you can bake it in the oven. Bake it at 350 degrees until it reaches an internal temperature of 145 degrees F. This can take about 25 minutes per pound. Here’s what I served it with: I stuffed the smoked pork crown roast with my keto cornbread stuffing. It turned out so fantastic! You could use a traditional stuffing as well if you are not eating keto. I also served it with some Cauliflower Mash and a Harvest Salad. You will also need to make the Citrus Dry Brine to rub on the roast. Here are some items that will make cooking this smoked crown roast easier:I used this pan to smoke the pork crown roast in the smoker. I love it because it’s made for a grill or smoker and it was super easy to clean! If you are looking for an awesome wireless meat thermometer, this is the one! I have been using my Meater Thermometer for about a year now and I really love it! You can set what you are cooking on the app on your phone! Works great! They now have a multiple pack which is great if you are cooking steaks and people want it at different finished temperatures. Pin This Now and Make it Later! 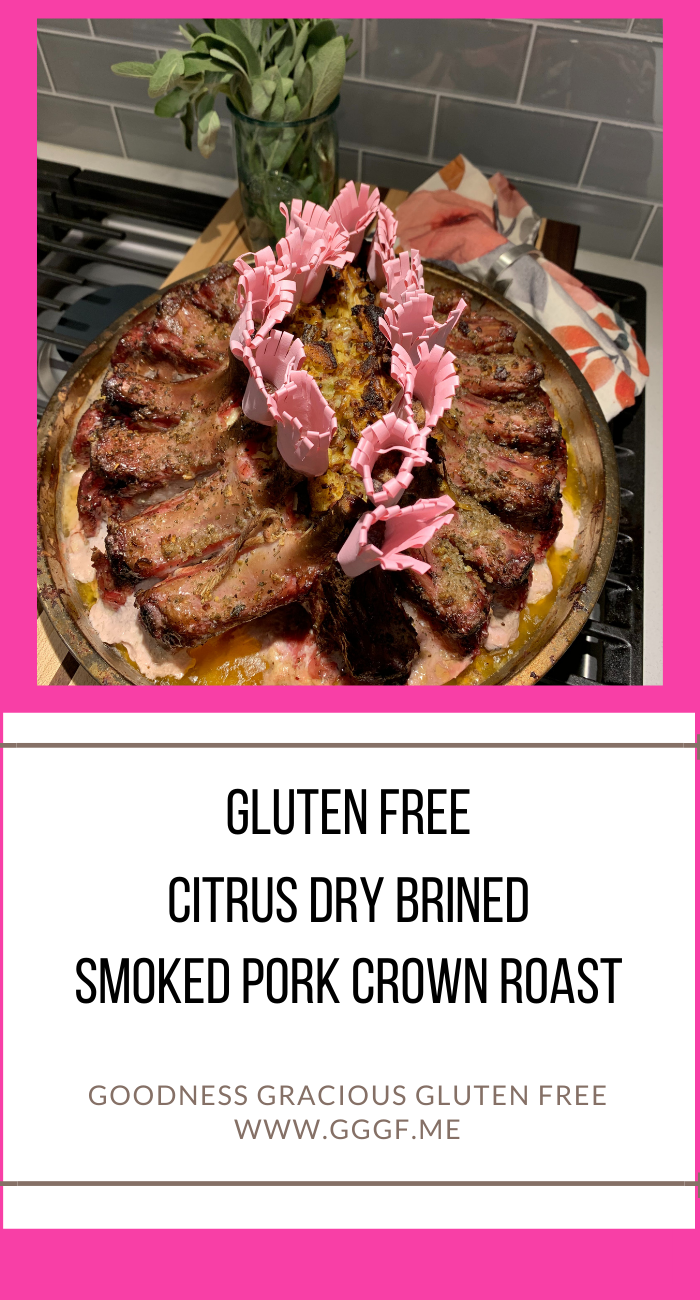
Here’s the TIKTOK for the short version or the YOUTUBE video for the long version:
Here’s the recipe:
Gluten Free Citrus Dry Brined Smoked Pork Crown Roast prep time: 6 HOURS cook time: 3 HOURS 30 MINUTES total time: 9 HOURS 30 MINUTES This smoked pork crown roast is super easy to make and is perfect for a fancy dinner or the holidays! Ingredients
Please share your pictures on Instagram if you make this recipe! I would love it if you also left a 5 star review! I hope you love this recipe as much as we do! As Always, Best Wishes for Gluten Free Dishes! XO, Michelle
Gluten Free-Keto Lamb Crown Roast is a delicious easy to make dish that looks fancy!
Our family loves lamb! It is so delicious and easy to make. I always make it for the holidays and sometimes on a random Tuesday! lol!
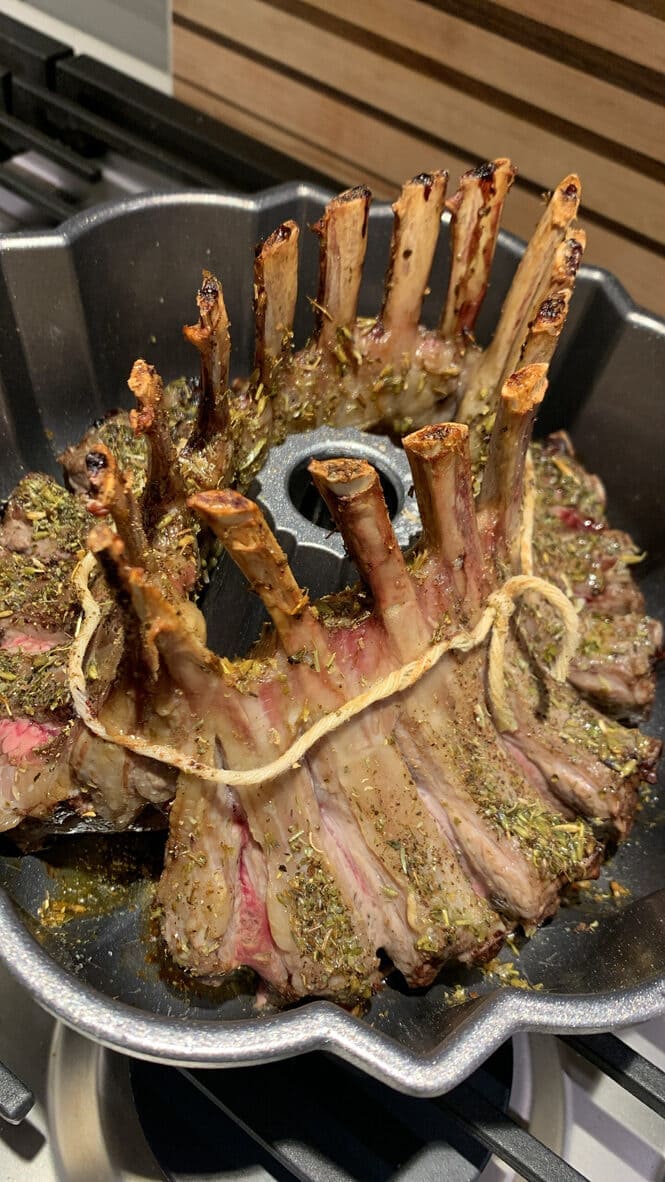
What is a Crown Roast? A lamb crown roast is two rib roasts that have been french cut, which means having the meat trimmed off of the tips of the bone and then tied together in a circle. What do I need to make this recipe? You will need the following items and ingredients to make this recipe: A bundt pan Meat twine Two racks of lamb rib roast Herbs De Province Olive Oil S & P And an oven to cook them in 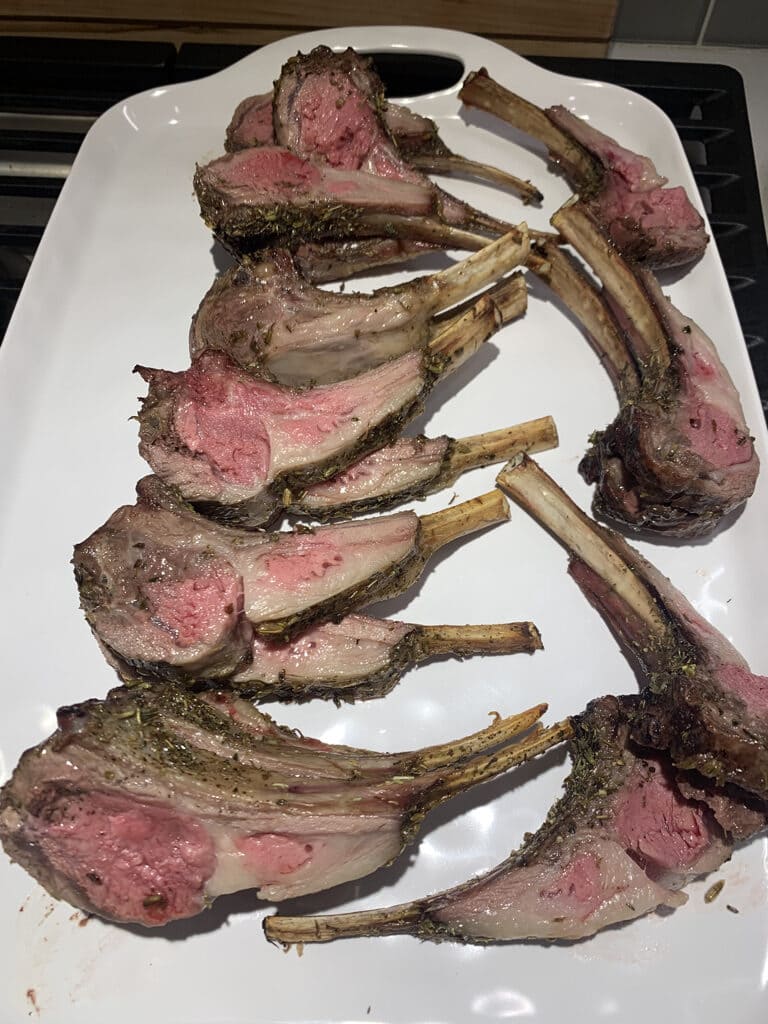
How do I make this Lamb Crown Roast? The first thing to do is cut your lamb roast so it will lay in a circle. You can see how to do this in the video below. Season your roast with Olive oil, S&P as well as Herbs de Province. Then you are going to tie the lamb crown roasts together into a circle. I find this easy to do by putting it into a bundt pan! I use meat twine to tie the two roasts together. Bake the lamb in an oven until it reaches 135 degrees internal temperature. I personally do not like an overcooked lamb. I love my MEATER thermometer to monitor the temperatures of meat while I cook it. If you order something from my links I will get a small commission. Thank you! Here are my policies and disclosures. Once it reaches 135 degrees remove it from the oven and cover it with foil to rest for about 15 minutes. Slice it between the ribs and it’s ready to serve! YUMMMMMM!!!!!! Here are a few ideas of what to serve with your Lamb Crown Roast! Gluten Free Cheesy Polenta Mashed Cauliflower Shredded Brussel Sprout Salad My family loves it when I make Mascarpone Honey Sauce that goes with it too! Yummy! Pin Me Now Make Me Later! 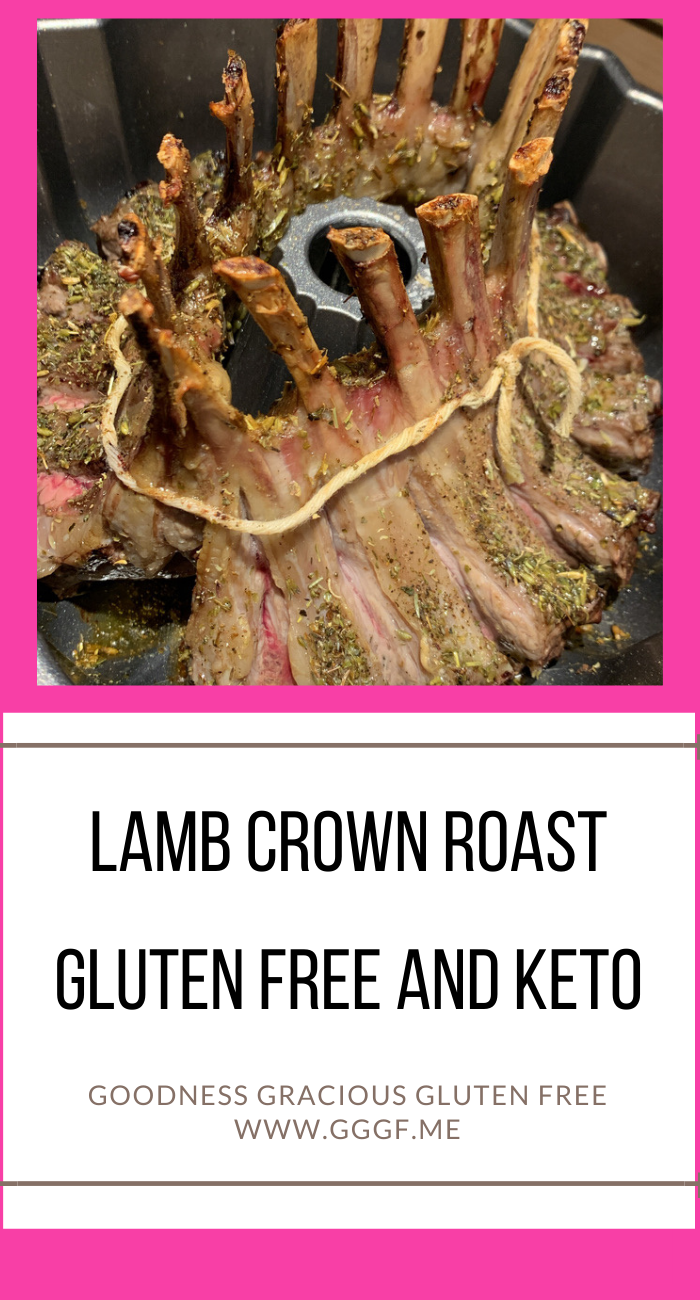
Here’s the video on how to make it:
Here’s the recipe:
Lamb Crown Roast- Gluten Free and Keto! prep time: 30 MINUTES cook time: 35 MINUTES total time: 1 HOUR 5 MINUTES This Lamb Crown Roast looks fancy but is really easy to make! Super delicious! Ingredients
As Always, Best Wishes for Gluten Free Dishes! XO, Michelle
Here are my top 10 Halloween Recipes that are all gluten free on my blog! Just to clarify, every recipe on my blog is gluten free!

Are you ready for Halloween?I like to make festive foods for holidays, so I thought I would share my top 10 Halloween recipes with you all!
I hope you love them as much as we have over the years! Each Halloween I make different combinations of all of these recipes. It just depends if we are hosting family or friends or if we are going to someone else’s house for Halloween. This year we are handing out candy at home for the first time in forever! Our friends are coming over and so is one of our daughters. It should be a pretty low key Halloween which is perfect! Here are my top 10 recipes for Halloween! Spooky Eyeball Meatballs Spider Web Bean Dip Mummy Meatloaf Spooky Cheese Cut Outs for a Halloween Charcuterie Board Spider Eggs Mummy Stuffed Peppers Chili in my Instant Pot with or without a finger Mummy Calzones Mummy Dogs Caramel Apple Martinis And as a bonus, if you are trying to ward off vampires, you might like my 40 cloves of garlic chicken! Hehe! I was having a little nostalgia today when talking to my youngest daughter on the phone. I was telling her about the post for my Halloween recipes and she asked if I was putting the Mummy Meatloaf in it. Haha! It must be one of her favorite dishes I have made on Halloween! I will have to ask my oldest daughter what her favorite is! I hope you have a safe and spooky Halloween! Not too spooky though…. I can’t even watch the commercial for a scary movie without having nightmares! As Always, Best Wishes for Gluten Free Dishes! XO, Michelle
Gluten Free Mummy Dogs are super cute and a quick dinner that is perfect before trick or treating!

Gluten free Mummy Dogs are a super cute and easy dinner or appetizer for Halloween! They are ready to eat in less than 30 minutes!
How do I make these super cute gluten free mummy dogs? These dogs are so easy to make! I whipped up a batch of my FATHEAD dough to keep it keto, and wrapped them around all-beef hot dogs to make the mummies! You can use olives or capers to make the eyes:) I tried this recipe first with the thicker sausage and it didn’t work out well. I found that you need to roll the fathead dough pretty thin for it to stay in the mummy shape. Protip- put a little olive oil on your hands before rolling out the dough so it doesn’t stick. If you wanted them not to be keto or low carb, you could use a premade gluten free pie crust and cut it into strips and wrap them around as well. It would also be delicious! What do I need to make this recipe? You will need the following ingredients: All ingredients for fathead dough- cream cheese, mozzarella cheese, almond flour, and an egg. Gluten free hot dogs- just the regular size not the sausage ones. Olives with pimentos. Capers Any dipping sauces you like. 
Here’s the recipe:
Gluten Free Mummy DogsA super cute and easy to make appetizer or dinner for Halloween. INGREDIENTS
As Always, Best Wishes for Gluten Free Dishes! XO, Michelle
These Gluten Free Spooky Calzones are a super cute dinner for Halloween!

These gluten free spooky calzones are fun to make for dinner on Halloween! I made them low carb and they are delicious!
How do I make these Spooky Calzones? These spooky calzones are super easy to make and fun to get creative with what spooky shape you are going to make! I made mine into little ghosts and I attempted to make some into Mummys, but they didn’t look as cute. I used my FATHEAD DOUGH recipe for the crust. It’s super easy to make and only takes a couple of minutes to whip up! You can fill them with your favorite pizza toppings! I kept these simple and just used pepperoni and cheese. Some of our favorite fillings are: Ground Beef Yellow Onion and Saurkraut Ham and Green Olives Tomato Basil Mozzarella Fig Chicken and Brie All the Italian meats What are some of your favorites? Pro Tips: If you put a little bit of olive oil on your hands before you start handling the fathead dough it will stick less to your fingers. Try not to stretch the dough super thin or it could break and all of your toppings will escape during cooking. Pin now so you can make it later! 
As Always,
Best Wishes for Gluten Free Dishes! XO, Michelle Gluten Free Spaghetti Squash Alfredo is super creamy and delicious! I love to add chicken or shrimp to it to make it the perfect meal! 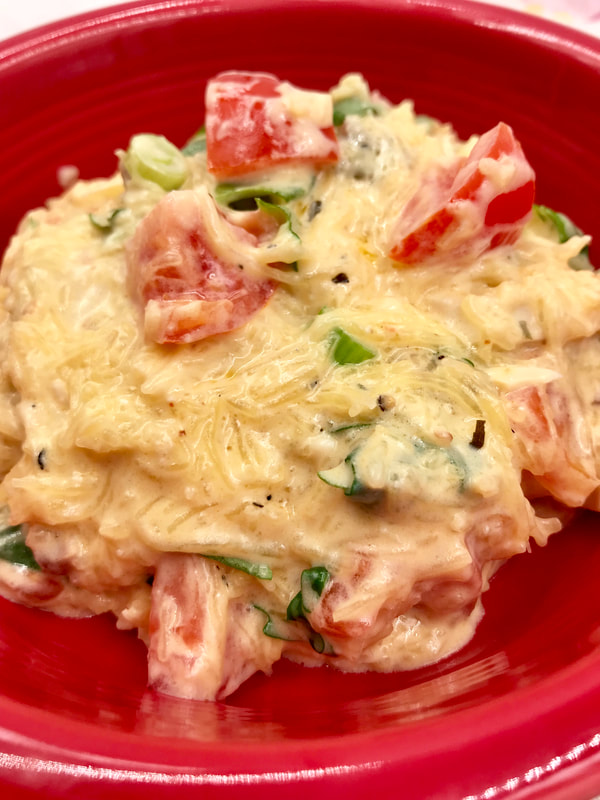 Gluten Free Spaghetti Squash Alfredo is a very flavorful and easy to make dinner!
I like to roast my spaghetti squash in the oven and cook the bacon at the same time. While it is roasting, I make the alfredo sauce and chop my veggies so it’s all done at about the same time! Here’s what you need to make this gluten free spaghetti squash alfredo: You will need the following ingredients: chicken or shrimp bacon tomatoes spinach a spaghetti squash cream cheese heavy cream garlic powder salt and pepper shredded parmesan cheese fresh basil to garnish if you’d like Here’s how to make it: I like to cut my spaghetti squash in half (remove the seeds) and put a little olive oil on a sheet pan and roast it cut side down in the oven. Roast it at 350 degrees for about 30-45 minutes. It’s done when you can easily poke a fork in it. Set it aside to cool. While the squash is roasting, make your alfredo sauce. You can find my ALFREDO SAUCE recipe here. Chop up the other veggies. When the bacon is finished cooking, chop it up as well. I like to use rotisserie chicken in this recipe, but you can precook some chicken and chop it up too. If you are using shrimp, you will want to precook it too. Carefully, scoop the hot spaghetti squash into a large bowl. I like to use a fork to shred it so it looks like spaghetti. Put the other veggies into the bowl. Add your chicken or shrimp. Pour the sauce into the bowl. Use as much of as little as you’d like. Crumble the bacon on top… I’m drooling now! Garnish with fresh basil! Voila! You are ready to eat! Gluten Free Spaghetti Squash Alfredo INGREDIENTS
As Always, Best Wishes for Gluten Free Dishes! XO, Michelle |

Hey There!I am so glad you are here! Categories
All
Archives
June 2023
|


 RSS Feed
Click to upload Footer Background below